流行的网站建设技术有哪些it培训学校it培训机构
前言
记录小白如何搭建个人博客
github部署的博客👉: DreamLuffe的博客
netilify部署的博客:👉:DreamLuffe的博客
个人博客搭建实战
网上有很多优秀的开源博客页面,我们就直接安装好,再继续开发。我这里找到的是vuepress-theme-reco这个博客模板。
# init
npm install @vuepress-reco/theme-cli -g
theme-cli init myblog# install
cd myblog
npm install# run
npm run dev# build
npm run build
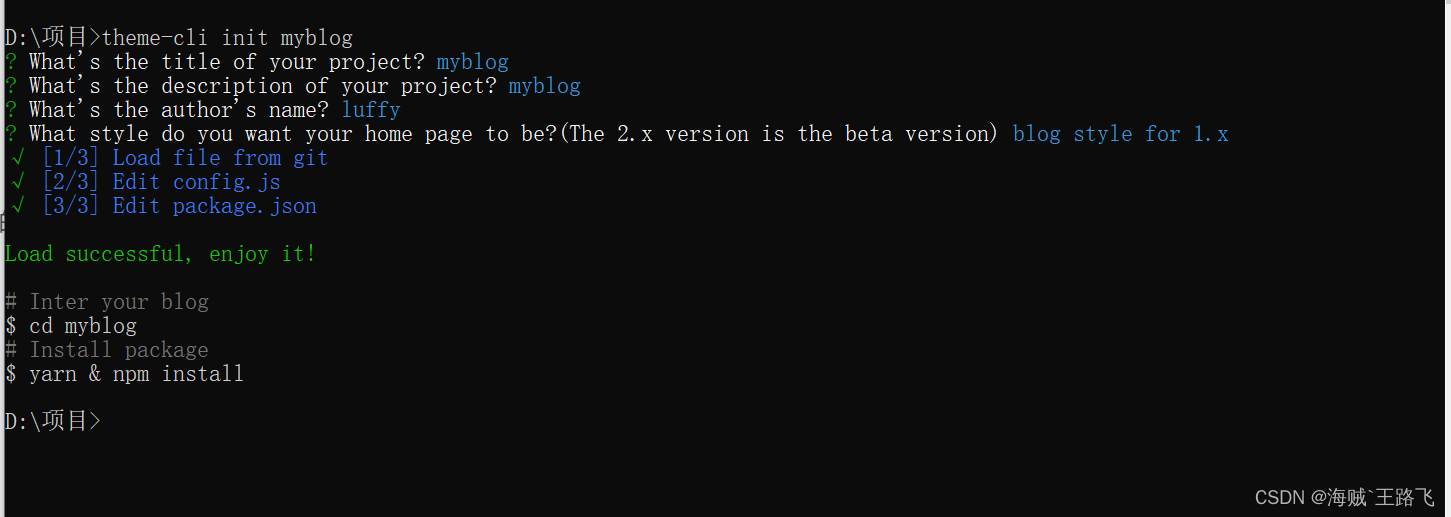
npm run dev 跑起来在 http://localhost:8080/ 访问
目录结构
├── docs
│   ├── .vuepress (可选的)
│   │   ├── components (可选的)
│   │   ├── theme (可选的)
│   │   │   └── Layout.vue
│   │   ├── public (可选的)
│   │   ├── styles (可选的)
│   │   │   ├── index.styl
│   │   │   └── palette.styl
│   │   ├── templates (可选的, 谨慎配置)
│   │   │   ├── dev.html
│   │   │   └── ssr.html
│   │   ├── config.js (可选的)
│   │   └── enhanceApp.js (可选的)
│   │
│   ├── README.md
│   ├── guide (一般用户都在这个目录下创建网站指南,当然可以不用)
│   │   └── README.md (指南里面的具体内容)
│   └── config.md
│
└── package.json 项目初始化时,根目录下自动生成的配置文件,定义了项目的基本配置信息及需要依赖的各个模块、指定运行脚本命令的npm命令行缩写等。
打开config.js自定义配置
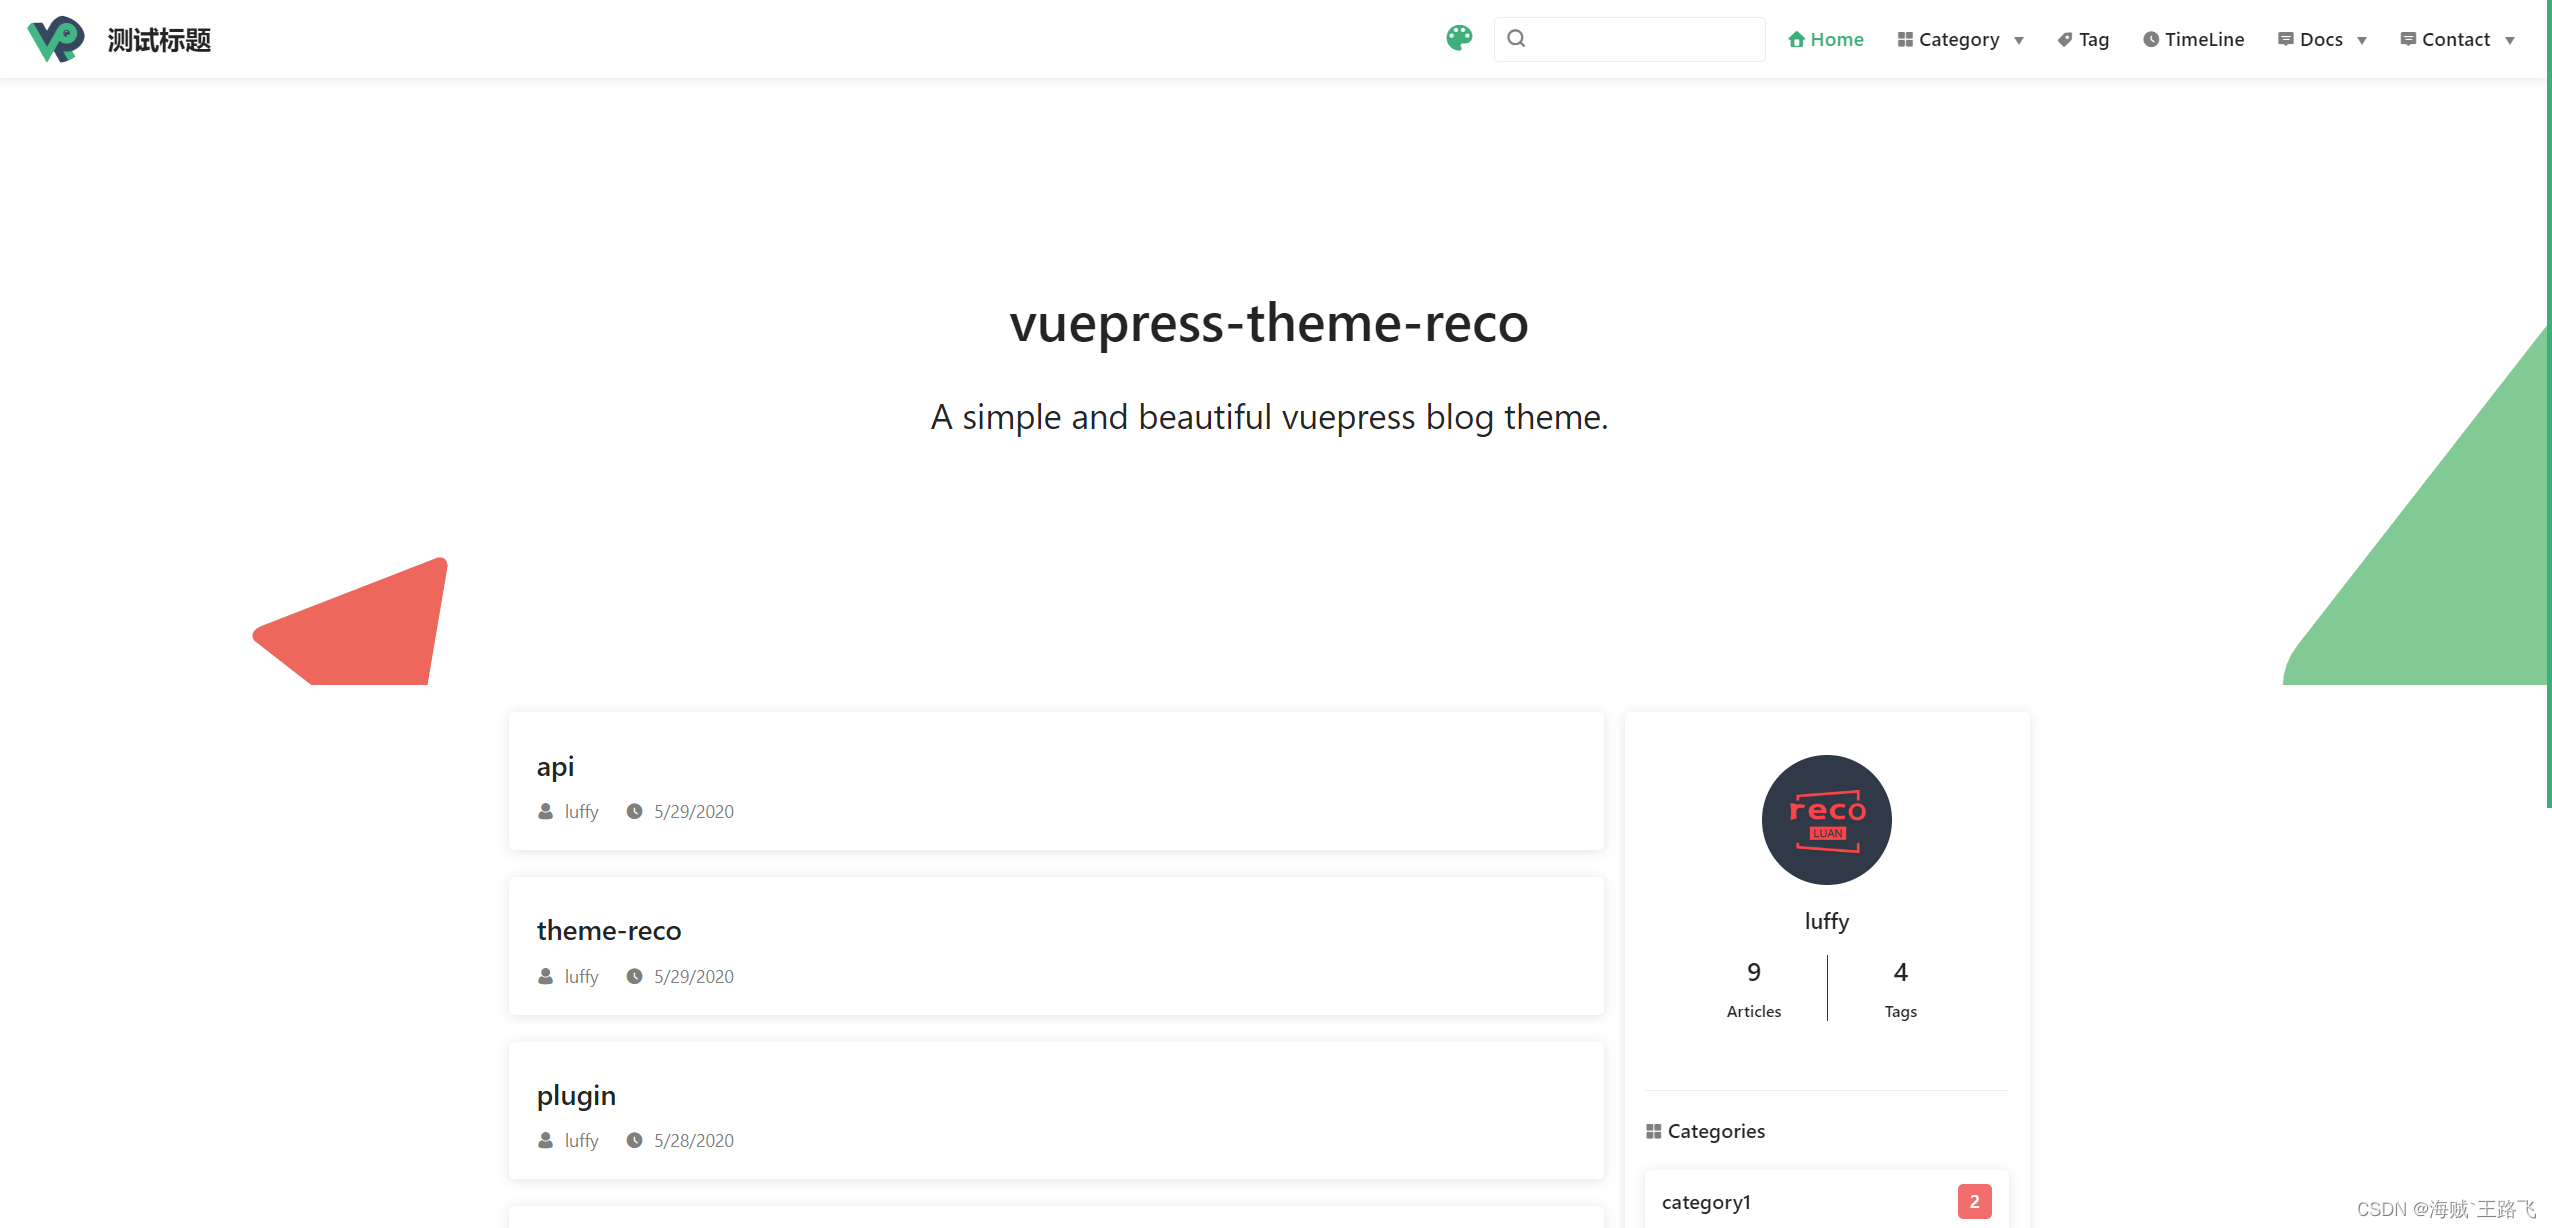
module.exports = {title: "测试标题", // 网站标题description: "测试的博客", //详情dest: "public", //打包文件夹名字head: [["link",{rel: "icon",href: "/favicon.ico", //网站图标},],["meta",{name: "viewport",content: "width=device-width,initial-scale=1,user-scalable=no",},],],theme: "reco", //主题themeConfig: {//主题的配置项//头部导航配置nav: [{text: "Home", //导航标题link: "/", //导航链接icon: "reco-home", //导航图标},{text: "TimeLine",link: "/timeline/",icon: "reco-date",},{text: "Docs",icon: "reco-message",items: [//嵌套多个{text: "vuepress-reco",link: "/docs/theme-reco/",},],},{text: "Contact",icon: "reco-message",items: [{text: "GitHub",link: "https://github.com/recoluan", //github链接icon: "reco-github",},],},],sidebar: {//侧边栏地址"/docs/theme-reco/": ["", "theme", "plugin", "api"],},type: "blog",blogConfig: {// 添加博客配置 在写文章的时候可以设置// categories://  - frontEnd// tags://  - vuecategory: {location: 2,text: "Category",},tag: {location: 3,text: "Tag",},},// 好友链接friendLink: [{title: "午后南杂",desc: "Enjoy when you can, and endure when you must.",email: "1156743527@qq.com",link: "https://www.recoluan.com",},{title: "vuepress-theme-reco",desc: "A simple and beautiful vuepress Blog & Doc theme.",avatar:"https://vuepress-theme-reco.recoluan.com/icon_vuepress_reco.png",link: "https://vuepress-theme-reco.recoluan.com",},],// 左上角logo配置logo: "/logo.png",// 是否开启搜索框search: true,// 搜索最多展示多少条searchMaxSuggestions: 10,lastUpdated: "Last Updated",// 作者author: "luffy",// 作者头像authorAvatar: "/avatar.png",record: "xxxx",// 开始时间startYear: "2017",},markdown: {// 是否在每个代码块的左侧显示行号。lineNumbers: true,},
};
配置详细请看
vuepress-theme-reco
vuepress配置
部署GitHub个人网站
第一步:新建仓库
在GitHub上,创建一个新的仓库,仓库名设置为如下格式:账户名.github.io
(这里因为我已经有这个仓库了所以爆红)

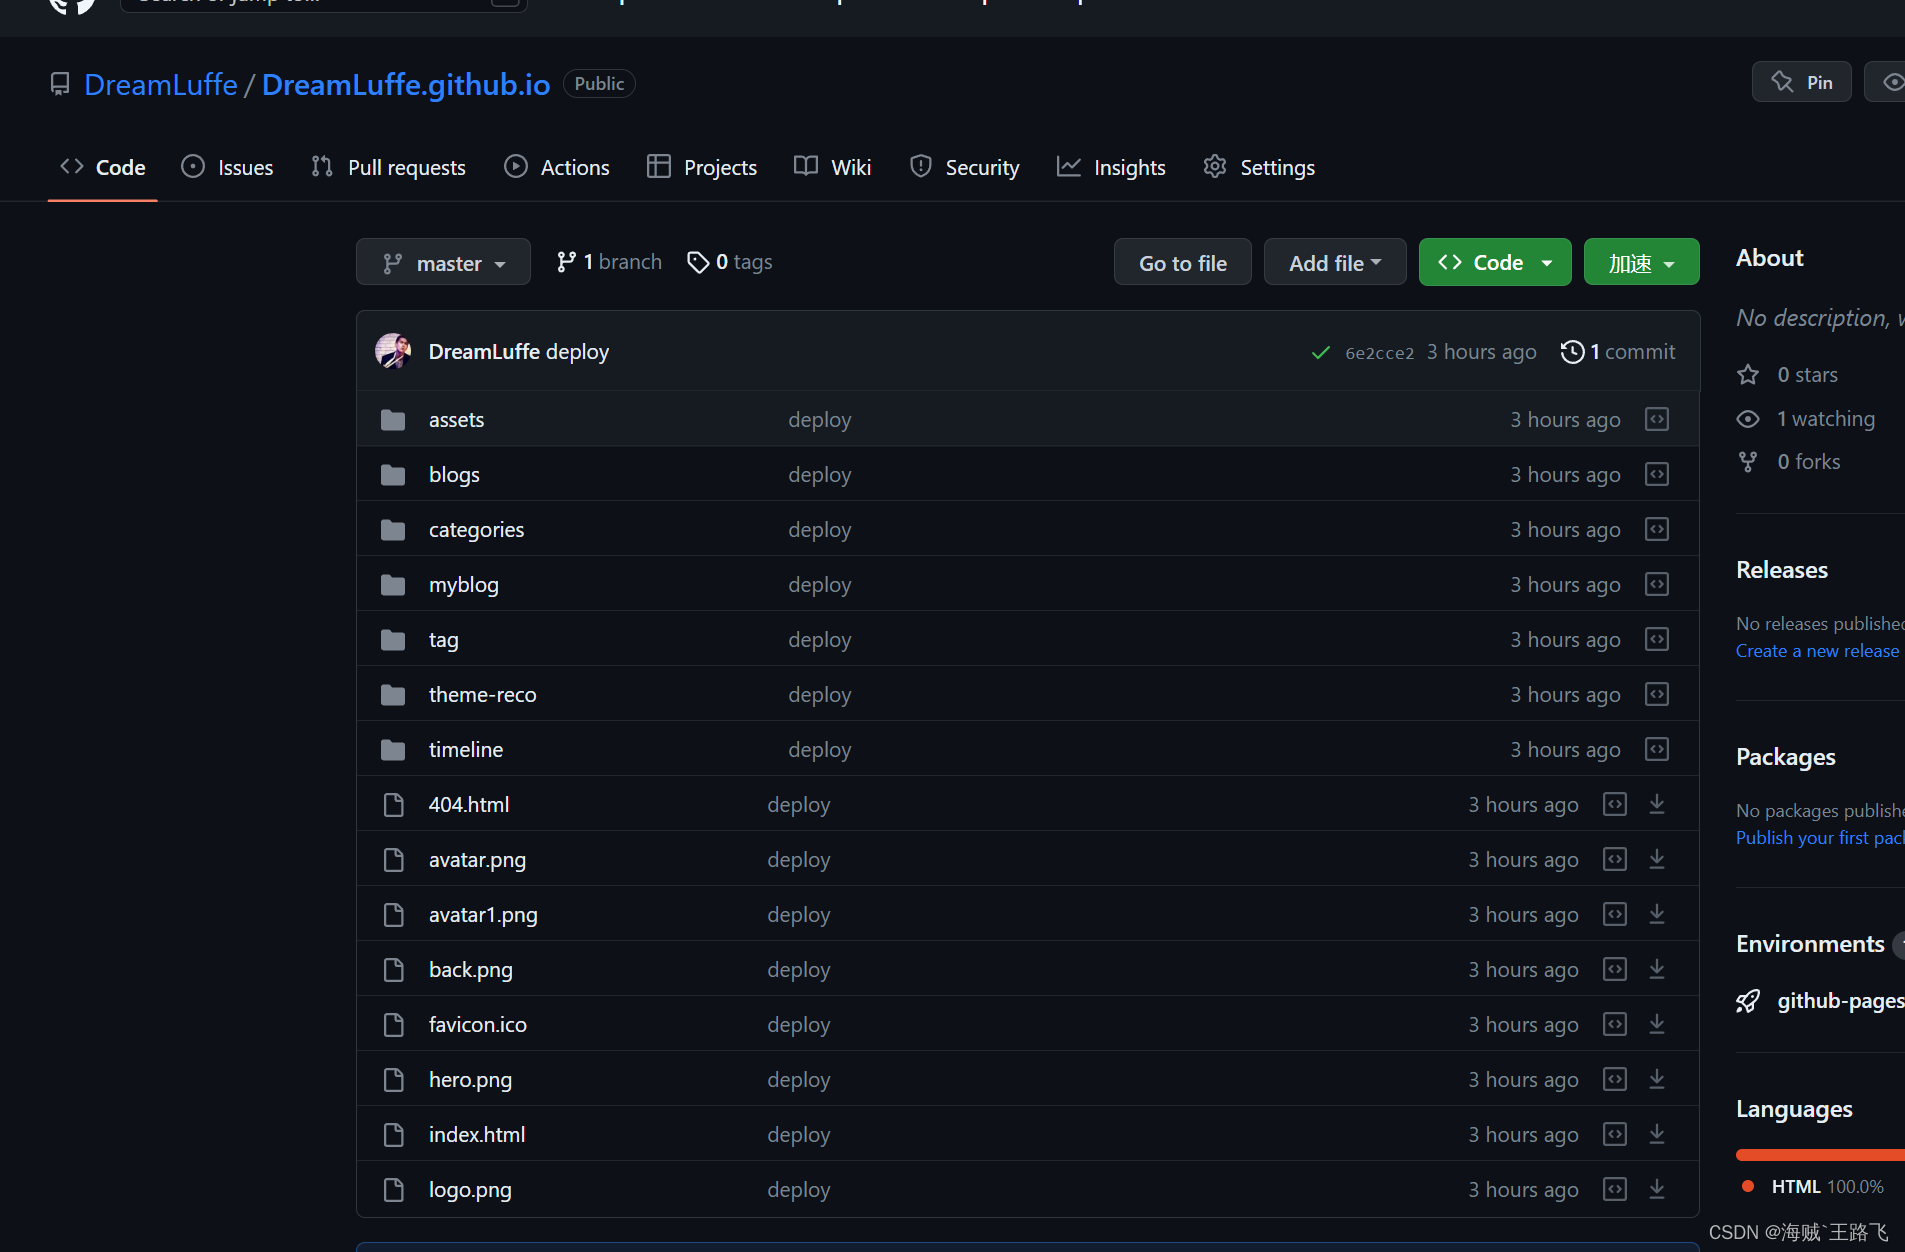
第二步:打包上传
npm run build 之后会在根目录生成 public 文件夹 使用 git命令 上传到GitHub上
//上传流程
git init
git add -A
git commit -m 'deploy'
git branch -m master
git push -f https://github.com/XXXX.github.io.git master
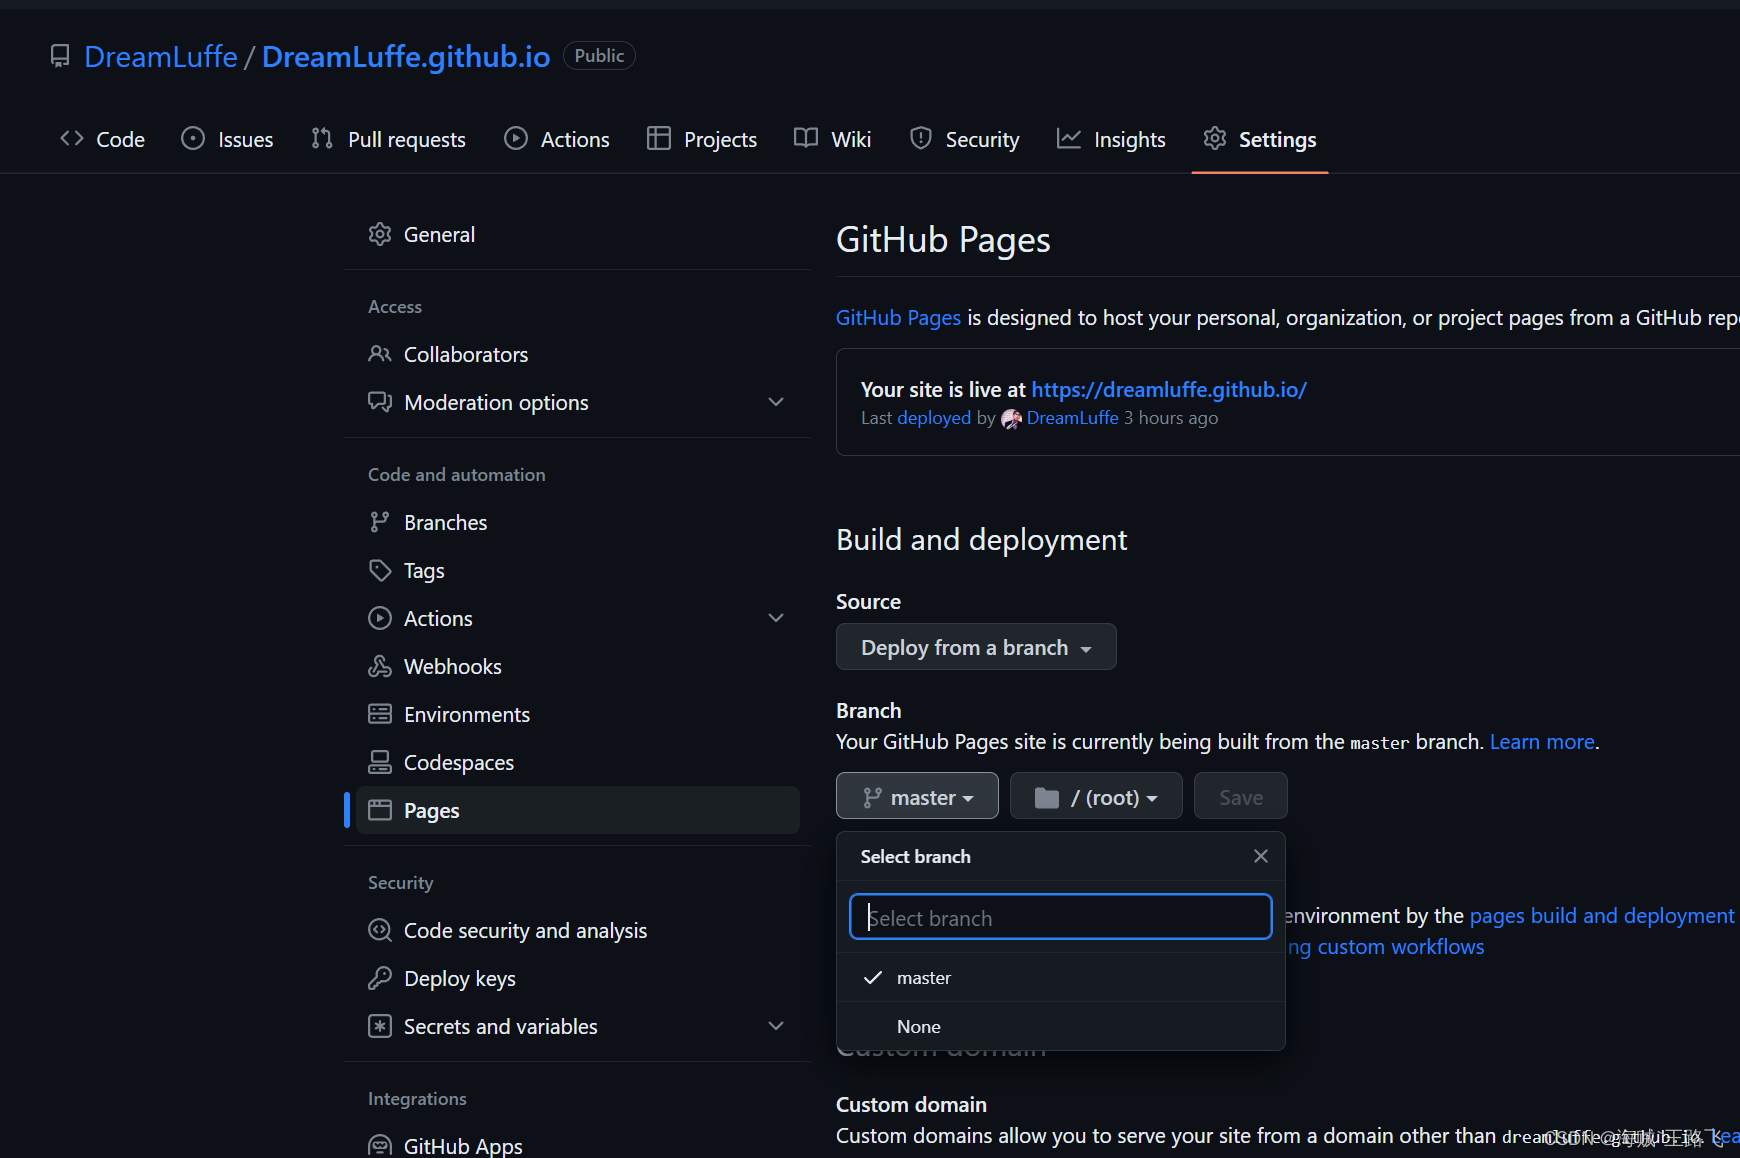
打开仓库设置点击pages 如下操作
自动部署脚本
在根目录新建deploy.sh
#!/usr/bin/env sh# 确保脚本抛出遇到的错误
set -e# 生成静态文件, npm run build
npm run build# # 进入生成的文件夹
cd ./public# git初始化,每次初始化不影响推送
git init
git add -A
git commit -m 'deploy'
git branch -M master# 如果你想要部署到 https://XXXX.github.io
git push -f https://github.com/XXXX.github.io.git master
echo "部署成功"
package.json 文件配置
"scripts": {"upload": "bash deploy.sh"}
执行npm run upload 实现本地打包上传github