几年前我为客户建设网站杭州seo网站排名
目录
- DSP开发例程: logbuf_print_to_uart
- 新建工程
- 源码编辑
- app.cfg
- os.c
- main.c
- 调试
- 说明
DSP开发例程: logbuf_print_to_uart
SYS/BIOS 提供了 xdc.runtime.Log, xdc.runtime.LoggerBuf 和 xdc.runtime.LoggerSys 这几个模块用于日志记录. 日志信息在 应用程序调试和状态监控中非常实用. 日志记录函数相较于 System_printf() 占用的时间更短, 且可以区分事件的等级, 如: Info, Warning 和 Error 等.
此例程实现将 SYS/BIOS 日志信息通过串口输出, 并在 EVM6678L 开发板上进行了测试. 例程源码可从我的 gitee 仓库上克隆或下载. 点击 DSP 开发教程(0): 汇总查看其他例程说明.
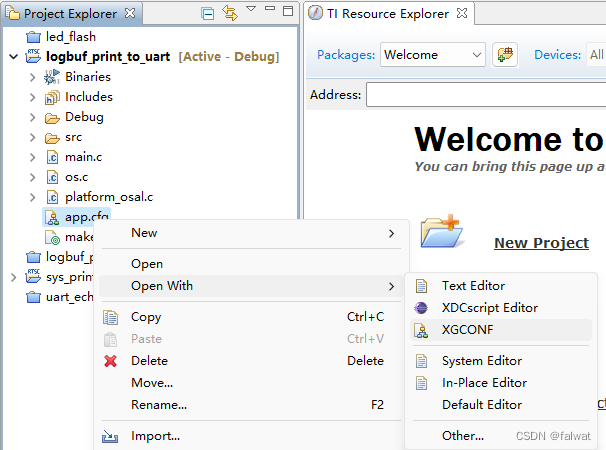
新建工程
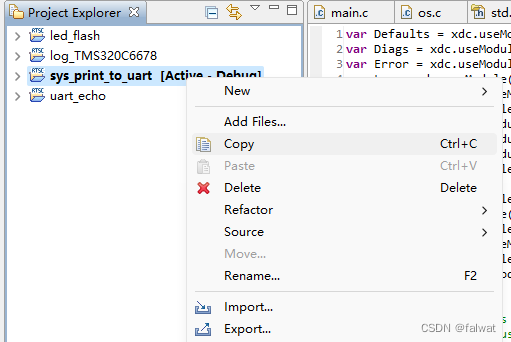
此示例工程直接在 sys_print_to_uart 工程基础上修改.
- 选中 sys_print_to_uart 工程, 右键选择 Copy 或 使用快捷键
Ctrl+C复制工程.
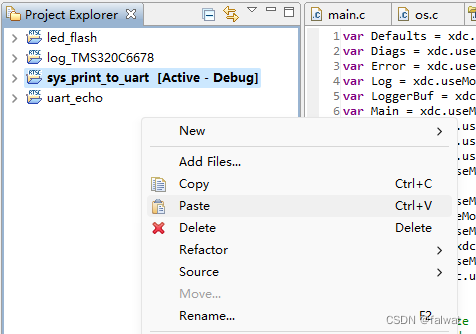
- 在工程浏览视图中, 右键选择 Paste 或使用快捷键
Ctrl+V粘贴工程.
- 在弹出的 Copy Project 对话框中 修改工程名为: logbuf_print_to_uart, 点击 OK.
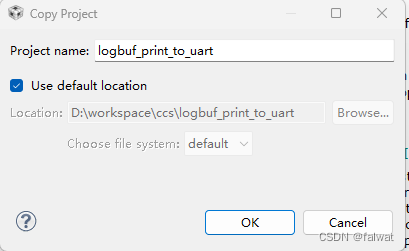
- 删除 logbuf_print_to_uart 工程中的 Debug目录, 右键选择 Build Project, 编译此工程.
源码编辑
app.cfg
- 使用 XGCONF 打开 app.cfg 文件.
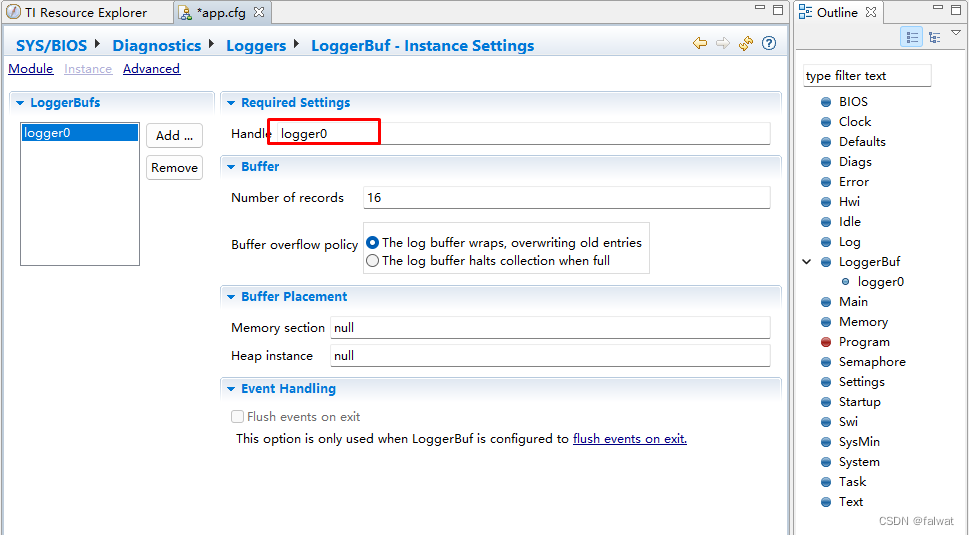
- 点击 logger0.
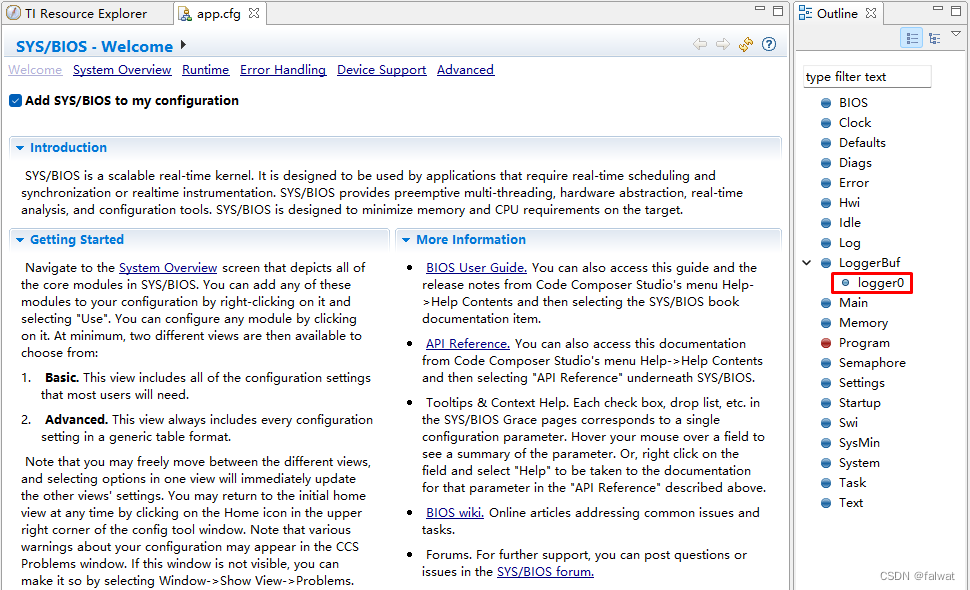 - 将 logger0 的句柄设置为
 logger0.
 - 点击 Timestamp 模块.

- 勾选 Add Timestamp to my configuration.
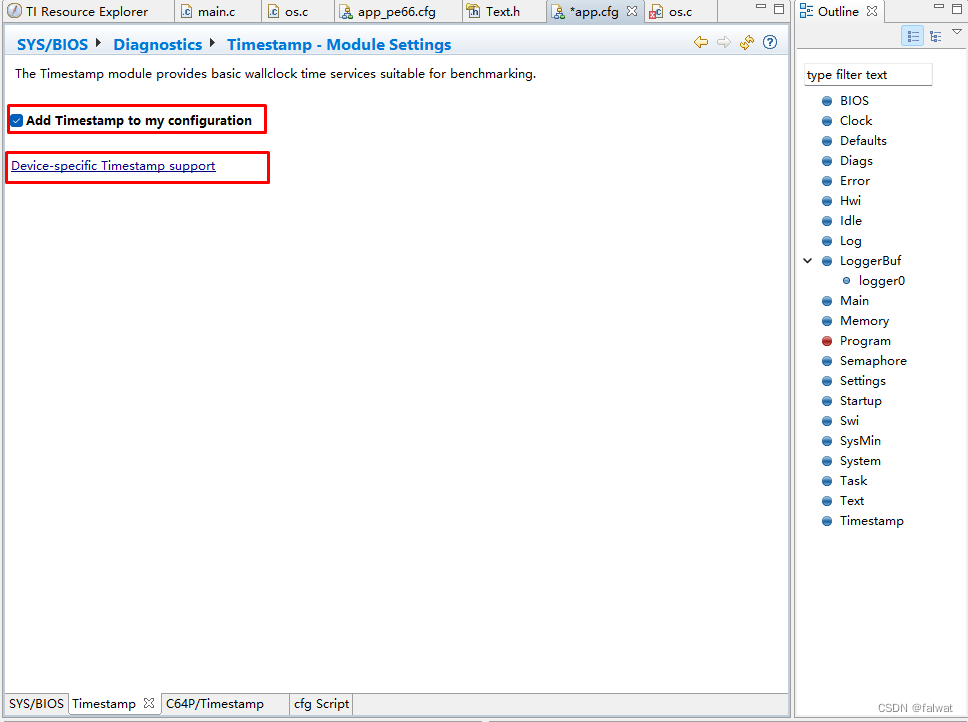
- 保存修改.
os.c
编辑 os.c 源文件, 其内容如下:
/** os.c**  Created on: 2023-10-26*      Author: falwa*/
#include <xdc/std.h>
#include <xdc/runtime/Log.h>
#include <xdc/runtime/LoggerBuf.h>
#include <xdc/runtime/System.h>
#include <xdc/runtime/Text.h>
#include <xdc/runtime/Types.h>
#include <xdc/runtime/Timestamp.h>extern LoggerBuf_Handle logger0;/**  ======== doPrint ========*/
Void myLog_doPrint(Log_EventRec *er)
{Text_RopeId rope;String fmt;Bits32 hi, lo;Types_FreqHz freq;uint32_t msec;Timestamp_getFreq(&freq);/* print timestamp if there is one; ~0 isn't a valid timestamp value */hi = er->tstamp.hi;lo = er->tstamp.lo;msec = (((uint64_t)hi << 32) | lo) / (freq.lo/1000);System_printf("[%5d.%03ds] ", msec/1000, msec%1000);/* print event */rope = Types_getEventId(er->evt);   /* the event id is the message rope */if (rope == 0) {/* Log_print() event */System_aprintf((String)iargToPtr(er->arg[0]),er->arg[1], er->arg[2], er->arg[3], er->arg[4],er->arg[5], er->arg[6], 0,          0);}else {/* Log_write() event */fmt = Text_ropeText(rope);if (Text_isLoaded) {System_aprintf(fmt, er->arg[0], er->arg[1], er->arg[2], er->arg[3],er->arg[4], er->arg[5], er->arg[6], er->arg[7]);}else {System_aprintf("{evt: fmt=%p, args=[0x%x, 0x%x ...]}",fmt, er->arg[0], er->arg[1]);}}System_putch('\n');
}/**  ======== LoggerBuf_flush ========*/
Void myLoggerBuf_flush(LoggerBuf_Object *obj)
{Int nEntries;Log_EventRec evtRec;for (;;) {nEntries = LoggerBuf_getNextEntry(obj, &evtRec);if (nEntries == 0) {break;}else {if (nEntries != -1) {myLog_doPrint(&evtRec);}}}
}/*** 添加此函数到 Idle Thread.** ```xdc* var Idle = xdc.useModule('ti.sysbios.knl.Idle');** Idle.idleFxns[0] = "&os_systemFlush";* ```*/
void os_systemFlush()
{if (logger0)myLoggerBuf_flush(logger0);System_flush();
}/*** 将  System_printf() 重定向到  platform_uart_write().** 请在 .cfg 中添加:* ```* SysMin.outputFxn = "&os_systemOutput";* ```*/
Void os_systemOutput(Char *str, UInt len)
{UInt i;for(i = 0; i < len; i++){platform_uart_write(str[i]);}
}
其中新增了两个函数 myLog_doPrint() 和 myLoggerBuf_flush() , 这两个函数参考 C:\ti\xdctools_3_25_03_72\packages\xdc\runtime\LoggerBuf.c 中的 Log_doPrint() 和 LoggerBuf_flush() 进行设计. 其中,
myLog_doPrint()用于调用System_printf()格式化打印一条日志事件;myLoggerBuf_flush()负责调用myLog_doPrint()格式化 并 flush logBuf 中的所有日志事件.
在 os_systemFlush() 函数中调用 myLoggerBuf_flush(logger0); 完成日志的 flush.
main.c
编辑 main.c, 其内容如下:
/**  ======== main.c ========*/
#include <stdio.h>
#include <string.h>#include <xdc/std.h>#include <xdc/runtime/Error.h>
#include <xdc/runtime/Log.h>
#include <xdc/runtime/System.h>#include <ti/sysbios/BIOS.h>#include <ti/sysbios/knl/Task.h>#include <ti/platform/platform.h>/**  ======== taskFxn ========*/
Void task_ledFlash(UArg a0, UArg a1)
{int i = 1;Log_info0("enter task_ledFlash().");while(1){platform_led(0, PLATFORM_LED_ON, PLATFORM_USER_LED_CLASS);Log_info1("LED 0 ON at %d times.", i);Task_sleep(500);platform_led(0, PLATFORM_LED_OFF, PLATFORM_USER_LED_CLASS);Log_info1("LED 0 OFF at %d times.", i);Task_sleep(500);i++;}
}/*** 平台初始化*/
void EVM_init()
{platform_init_flags init_flags;platform_init_config init_config;// plaform initializememset(&init_flags, 1, sizeof(platform_init_flags));init_flags.phy = 0;memset(&init_config, 0, sizeof(platform_init_config));if (platform_init(&init_flags, &init_config) != Platform_EOK){printf("Platform failed to initialize, errno = 0x%x \n", platform_errno);while(1);}platform_uart_init();
}/**  ======== main ========*/
Int main()
{ Task_Handle task;Error_Block eb;Log_info0("enter main().");Log_error1("Log_error1(%d)", 1);Log_warning2("log_warnning2(%d, %d)", 1, 2);Error_init(&eb);task = Task_create(task_ledFlash, NULL, &eb);if (task == NULL) {System_printf("Task_create() failed!\n");BIOS_exit(0);}BIOS_start();    /* does not return */return(0);
}
其中 调用了 Log_info#(), Log_error#() 和 Log_warning#() 这几个日志事件记录函数进行测试.
保存上述更改, 并编译工程.
调试
完成编译后, 在 EVM6678L 上调试.
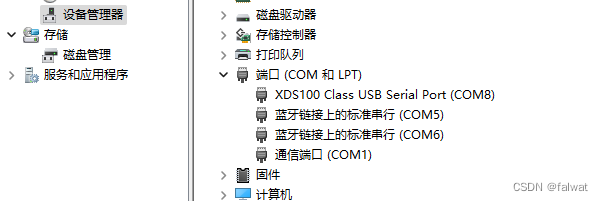
串口通过USB连接计算机. 请确保 COM_SEL1 跳线设置在正确位置. 且在计算机设备管理器中能够找到对应板卡的串口.
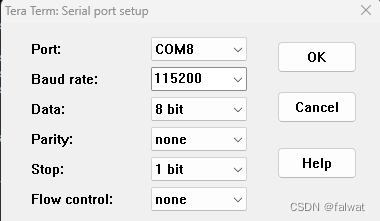
打开串口终端, 连接对应串口, 串口设置如下:
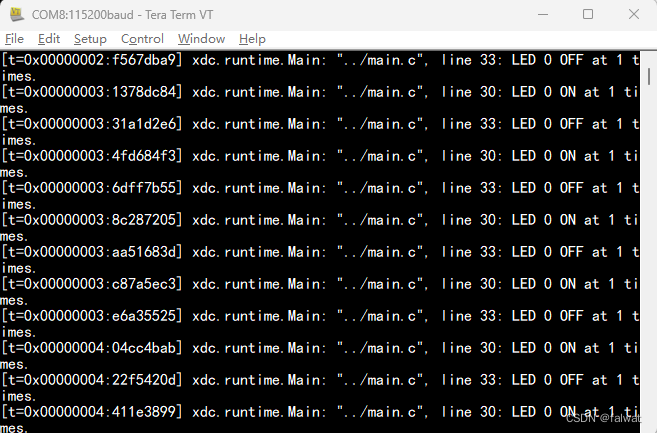
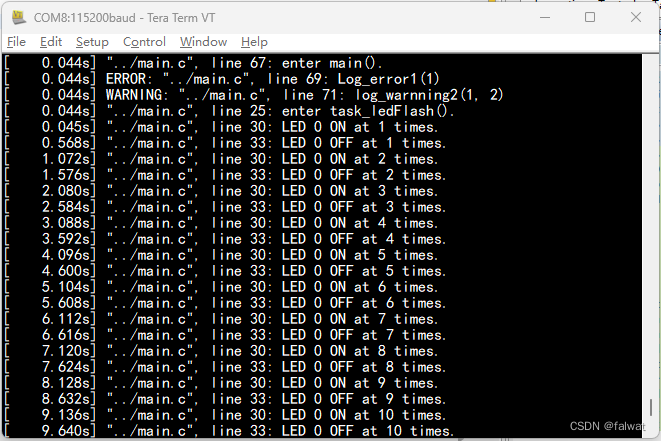
点击运行按钮, 运行程序. 此时在串口终端中能够看到打印的日志信息. 相较于 System_printf(), 增加了 时间戳, 文件名, 行数等信息.
说明
这只是 打印日志信息到串口的一种方式. 启用 xdc.runtime.LoggerSys 模块, 也可以实现日志信息的打印, 不过打印的格式不是很好看, 其中的时间戳是16进制显示的. 看图自行体会.