阿里云 iis 多个网站广点通
作业:day43的时候我们安排大家对自己找的数据集用简单cnn训练,现在可以尝试下借助这几天的知识来实现精度的进一步提高
import torch
import torch.nn as nn
import torch.optim as optim
from torchvision import datasets, transforms
from torchvision import datasets, transforms, models
from torch.utils.data import DataLoader
import matplotlib.pyplot as plt
import numpy as np# 定义设备(优先使用GPU,无GPU则使用CPU)
device = torch.device("cuda" if torch.cuda.is_available() else "cpu") # 添加此行# 定义通道注意力
class ChannelAttention(nn.Module):def __init__(self, in_channels, ratio=16):"""通道注意力机制初始化参数:in_channels: 输入特征图的通道数ratio: 降维比例,用于减少参数量,默认为16"""super().__init__()# 全局平均池化,将每个通道的特征图压缩为1x1,保留通道间的平均值信息self.avg_pool = nn.AdaptiveAvgPool2d(1)# 全局最大池化,将每个通道的特征图压缩为1x1,保留通道间的最显著特征self.max_pool = nn.AdaptiveMaxPool2d(1)# 共享全连接层,用于学习通道间的关系# 先降维(除以ratio),再通过ReLU激活,最后升维回原始通道数self.fc = nn.Sequential(nn.Linear(in_channels, in_channels // ratio, bias=False), # 降维层nn.ReLU(), # 非线性激活函数nn.Linear(in_channels // ratio, in_channels, bias=False) # 升维层)# Sigmoid函数将输出映射到0-1之间,作为各通道的权重self.sigmoid = nn.Sigmoid()def forward(self, x):"""前向传播函数参数:x: 输入特征图,形状为 [batch_size, channels, height, width]返回:调整后的特征图,通道权重已应用"""# 获取输入特征图的维度信息,这是一种元组的解包写法b, c, h, w = x.shape# 对平均池化结果进行处理:展平后通过全连接网络avg_out = self.fc(self.avg_pool(x).view(b, c))# 对最大池化结果进行处理:展平后通过全连接网络max_out = self.fc(self.max_pool(x).view(b, c))# 将平均池化和最大池化的结果相加并通过sigmoid函数得到通道权重attention = self.sigmoid(avg_out + max_out).view(b, c, 1, 1)# 将注意力权重与原始特征相乘,增强重要通道,抑制不重要通道return x * attention #这个运算是pytorch的广播机制## 空间注意力模块
class SpatialAttention(nn.Module):def __init__(self, kernel_size=7):super().__init__()self.conv = nn.Conv2d(2, 1, kernel_size, padding=kernel_size//2, bias=False)self.sigmoid = nn.Sigmoid()def forward(self, x):# 通道维度池化avg_out = torch.mean(x, dim=1, keepdim=True) # 平均池化:(B,1,H,W)max_out, _ = torch.max(x, dim=1, keepdim=True) # 最大池化:(B,1,H,W)pool_out = torch.cat([avg_out, max_out], dim=1) # 拼接:(B,2,H,W)attention = self.conv(pool_out) # 卷积提取空间特征return x * self.sigmoid(attention) # 特征与空间权重相乘## CBAM模块
class CBAM(nn.Module):def __init__(self, in_channels, ratio=16, kernel_size=7):super().__init__()self.channel_attn = ChannelAttention(in_channels, ratio)self.spatial_attn = SpatialAttention(kernel_size)def forward(self, x):x = self.channel_attn(x)x = self.spatial_attn(x)return ximport torch
import torch.nn as nn
import torch.nn.functional as F
import torchvision
import torchvision.transforms as transforms
import numpy as np
import matplotlib.pyplot as plt
from PIL import Image# 设置随机种子确保结果可复现(相同种子下随机操作结果一致)
torch.manual_seed(42)
np.random.seed(42)# -------------------- 数据预处理(增加训练集增强) --------------------
# 训练集预处理:包含数据增强(随机翻转)和归一化
transform_train = transforms.Compose([transforms.Resize((32, 32)), # 统一图像尺寸为32x32(与模型输入匹配)transforms.RandomHorizontalFlip(), # 随机水平翻转增强transforms.ToTensor(), # 转换为PyTorch张量(形状变为[C,H,W],范围0-1)transforms.Normalize((0.5, 0.5, 0.5), (0.5, 0.5, 0.5)) # 保持原归一化参数
])# 测试集预处理:无数据增强(保持原始分布用于评估)
transform_test = transforms.Compose([transforms.Resize((32, 32)),transforms.ToTensor(),transforms.Normalize((0.5, 0.5, 0.5), (0.5, 0.5, 0.5))
])# -------------------- 加载自定义猫狗数据集 --------------------
# 从本地文件夹加载数据(要求结构:petlmages/cat/*.png 和 petlmages/dog/*.png)
dataset = torchvision.datasets.ImageFolder(root=r'D:\桌面\研究项目\打卡文件\机器学习、深度学习相关操作篇30天\day43\PetImages', # 实际文件夹路径transform=transform_train # 初始使用旧transform(后续会更新)
)# 划分训练集和测试集(8:2比例)
train_size = int(0.8 * len(dataset))
test_size = len(dataset) - train_size
trainset, testset = torch.utils.data.random_split(dataset, [train_size, test_size])# -------------------- 添加数据加载器 --------------------
# 定义批次大小(根据GPU内存调整,如64/128)
batch_size = 64
# 训练集加载器(打乱数据,启用多进程加速)
train_loader = DataLoader(trainset, batch_size=batch_size, shuffle=True, # 训练时需要随机打乱数据num_workers=2 # 多进程加载(根据CPU核心数调整,0表示单进程)
)
# 测试集加载器(不打乱数据,保持原始顺序)
test_loader = DataLoader(testset, batch_size=batch_size, shuffle=False, # 测试时无需打乱数据num_workers=2
)# -------------------- 类别名称调整为猫狗 --------------------
classes = ('猫', '狗') # 对应ImageFolder的类别顺序(按文件夹名排序,cat为0,dog为1)# 关键修复:更新原始数据集的transform为新的训练集预处理(避免测试集继承旧尺寸)
dataset.transform = transform_train
# 测试集单独使用无增强的预处理
testset.dataset.transform = transform_test# 自定义ResNet18模型,插入CBAM模块
class ResNet18_CBAM(nn.Module):def __init__(self, num_classes=10, pretrained=True, cbam_ratio=16, cbam_kernel=7):super().__init__()# 加载预训练ResNet18self.backbone = models.resnet18(pretrained=pretrained) # 修改首层卷积以适应32x32输入(CIFAR10)self.backbone.conv1 = nn.Conv2d(in_channels=3, out_channels=64, kernel_size=3, stride=1, padding=1, bias=False)self.backbone.maxpool = nn.Identity() # 移除原始MaxPool层(因输入尺寸小)# 在每个残差块组后添加CBAM模块self.cbam_layer1 = CBAM(in_channels=64, ratio=cbam_ratio, kernel_size=cbam_kernel)self.cbam_layer2 = CBAM(in_channels=128, ratio=cbam_ratio, kernel_size=cbam_kernel)self.cbam_layer3 = CBAM(in_channels=256, ratio=cbam_ratio, kernel_size=cbam_kernel)self.cbam_layer4 = CBAM(in_channels=512, ratio=cbam_ratio, kernel_size=cbam_kernel)# 修改分类头self.backbone.fc = nn.Linear(in_features=512, out_features=num_classes)def forward(self, x):# 主干特征提取x = self.backbone.conv1(x)x = self.backbone.bn1(x)x = self.backbone.relu(x) # [B, 64, 32, 32]# 第一层残差块 + CBAMx = self.backbone.layer1(x) # [B, 64, 32, 32]x = self.cbam_layer1(x)# 第二层残差块 + CBAMx = self.backbone.layer2(x) # [B, 128, 16, 16]x = self.cbam_layer2(x)# 第三层残差块 + CBAMx = self.backbone.layer3(x) # [B, 256, 8, 8]x = self.cbam_layer3(x)# 第四层残差块 + CBAMx = self.backbone.layer4(x) # [B, 512, 4, 4]x = self.cbam_layer4(x)# 全局平均池化 + 分类x = self.backbone.avgpool(x) # [B, 512, 1, 1]x = torch.flatten(x, 1) # [B, 512]x = self.backbone.fc(x) # [B, 10]return x# 初始化模型并移至设备
model = ResNet18_CBAM().to(device)
criterion = nn.CrossEntropyLoss()
optimizer = optim.Adam(model.parameters(), lr=0.001)
scheduler = optim.lr_scheduler.ReduceLROnPlateau(optimizer, mode='min', patience=3, factor=0.5)import time# ======================================================================
# 4. 结合了分阶段策略和详细打印的训练函数
# ======================================================================
def set_trainable_layers(model, trainable_parts):print(f"\n---> 解冻以下部分并设为可训练: {trainable_parts}")for name, param in model.named_parameters():param.requires_grad = Falsefor part in trainable_parts:if part in name:param.requires_grad = Truebreakdef train_staged_finetuning(model, criterion, train_loader, test_loader, device, epochs):optimizer = None# 初始化历史记录列表,与你的要求一致all_iter_losses, iter_indices = [], []train_acc_history, test_acc_history = [], []train_loss_history, test_loss_history = [], []for epoch in range(1, epochs + 1):epoch_start_time = time.time()# --- 动态调整学习率和冻结层 ---if epoch == 1:print("\n" + "="*50 + "\n🚀 **阶段 1:训练注意力模块和分类头**\n" + "="*50)set_trainable_layers(model, ["cbam", "backbone.fc"])optimizer = optim.Adam(filter(lambda p: p.requires_grad, model.parameters()), lr=1e-3)elif epoch == 6:print("\n" + "="*50 + "\n✈️ **阶段 2:解冻高层卷积层 (layer3, layer4)**\n" + "="*50)set_trainable_layers(model, ["cbam", "backbone.fc", "backbone.layer3", "backbone.layer4"])optimizer = optim.Adam(filter(lambda p: p.requires_grad, model.parameters()), lr=1e-4)elif epoch == 21:print("\n" + "="*50 + "\n🛰️ **阶段 3:解冻所有层,进行全局微调**\n" + "="*50)for param in model.parameters(): param.requires_grad = Trueoptimizer = optim.Adam(model.parameters(), lr=1e-5)# --- 训练循环 ---model.train()running_loss, correct, total = 0.0, 0, 0for batch_idx, (data, target) in enumerate(train_loader):data, target = data.to(device), target.to(device)optimizer.zero_grad()output = model(data)loss = criterion(output, target)loss.backward()optimizer.step()# 记录每个iteration的损失iter_loss = loss.item()all_iter_losses.append(iter_loss)iter_indices.append((epoch - 1) * len(train_loader) + batch_idx + 1)running_loss += iter_loss_, predicted = output.max(1)total += target.size(0)correct += predicted.eq(target).sum().item()# 按你的要求,每100个batch打印一次if (batch_idx + 1) % 100 == 0:print(f'Epoch: {epoch}/{epochs} | Batch: {batch_idx+1}/{len(train_loader)} 'f'| 单Batch损失: {iter_loss:.4f} | 累计平均损失: {running_loss/(batch_idx+1):.4f}')epoch_train_loss = running_loss / len(train_loader)epoch_train_acc = 100. * correct / totaltrain_loss_history.append(epoch_train_loss)train_acc_history.append(epoch_train_acc)# --- 测试循环 ---model.eval()test_loss, correct_test, total_test = 0, 0, 0with torch.no_grad():for data, target in test_loader:data, target = data.to(device), target.to(device)output = model(data)test_loss += criterion(output, target).item()_, predicted = output.max(1)total_test += target.size(0)correct_test += predicted.eq(target).sum().item()epoch_test_loss = test_loss / len(test_loader)epoch_test_acc = 100. * correct_test / total_testtest_loss_history.append(epoch_test_loss)test_acc_history.append(epoch_test_acc)# 打印每个epoch的最终结果print(f'Epoch {epoch}/{epochs} 完成 | 耗时: {time.time() - epoch_start_time:.2f}s | 训练准确率: {epoch_train_acc:.2f}% | 测试准确率: {epoch_test_acc:.2f}%')# 训练结束后调用绘图函数print("\n训练完成! 开始绘制结果图表...")plot_iter_losses(all_iter_losses, iter_indices)plot_epoch_metrics(train_acc_history, test_acc_history, train_loss_history, test_loss_history)# 返回最终的测试准确率return epoch_test_acc# ======================================================================
# 5. 绘图函数定义
# ======================================================================
def plot_iter_losses(losses, indices):plt.figure(figsize=(10, 4))plt.plot(indices, losses, 'b-', alpha=0.7, label='Iteration Loss')plt.xlabel('Iteration(Batch序号)')plt.ylabel('损失值')plt.title('每个 Iteration 的训练损失')plt.legend()plt.grid(True)plt.tight_layout()plt.show()def plot_epoch_metrics(train_acc, test_acc, train_loss, test_loss):epochs = range(1, len(train_acc) + 1)plt.figure(figsize=(12, 4))plt.subplot(1, 2, 1)plt.plot(epochs, train_acc, 'b-', label='训练准确率')plt.plot(epochs, test_acc, 'r-', label='测试准确率')plt.xlabel('Epoch')plt.ylabel('准确率 (%)')plt.title('训练和测试准确率')plt.legend(); plt.grid(True)plt.subplot(1, 2, 2)plt.plot(epochs, train_loss, 'b-', label='训练损失')plt.plot(epochs, test_loss, 'r-', label='测试损失')plt.xlabel('Epoch')plt.ylabel('损失值')plt.title('训练和测试损失')plt.legend(); plt.grid(True)plt.tight_layout()plt.show()# ======================================================================
# 6. 执行训练
# ======================================================================
model = ResNet18_CBAM().to(device)
criterion = nn.CrossEntropyLoss()
epochs = 10
train_model=train_staged_finetuningprint("开始使用带分阶段微调策略的ResNet18+CBAM模型进行训练...")
final_accuracy = train_staged_finetuning(model, criterion, train_loader, test_loader, device, epochs)
print(f"训练完成!最终测试准确率: {final_accuracy:.2f}%")# torch.save(model.state_dict(), 'resnet18_cbam_finetuned.pth')
# print("模型已保存为: resnet18_cbam_finetuned.pth")# 加载/训练模型(修改保存路径)
try:model.load_state_dict(torch.load('cat_dog_cnn.pth'))print("已加载预训练模型")
except:print("无法加载预训练模型,训练新模型...")# 补充缺失的4个参数:criterion, train_loader, test_loader, devicetrain_model(model, criterion, train_loader, test_loader, device, epochs=1) # 修正后调用torch.save(model.state_dict(), 'cat_dog_cnn.pth') # 保存为猫狗模型model.eval()# Grad-CAM实现(未修改部分保持不变)
class GradCAM:def __init__(self, model, target_layer):self.model = modelself.target_layer = target_layerself.gradients = Noneself.activations = Noneself.register_hooks()def register_hooks(self):def forward_hook(module, input, output):self.activations = output.detach()def backward_hook(module, grad_input, grad_output):self.gradients = grad_output[0].detach()self.target_layer.register_forward_hook(forward_hook)self.target_layer.register_backward_hook(backward_hook)def generate_cam(self, input_image, target_class=None):model_output = self.model(input_image)if target_class is None:target_class = torch.argmax(model_output, dim=1).item()self.model.zero_grad()one_hot = torch.zeros_like(model_output)one_hot[0, target_class] = 1model_output.backward(gradient=one_hot)gradients = self.gradientsactivations = self.activationsweights = torch.mean(gradients, dim=(2, 3), keepdim=True)cam = torch.sum(weights * activations, dim=1, keepdim=True)cam = F.relu(cam)# Update interpolation size to match ResNet's input size (224x224)cam = F.interpolate(cam, size=(32, 32), mode='bilinear', align_corners=False)cam = cam - cam.min()cam = cam / cam.max() if cam.max() > 0 else camreturn cam.cpu().squeeze().numpy(), target_class# 可视化部分
import warnings
warnings.filterwarnings("ignore")
plt.rcParams["font.family"] = ["SimHei"]
plt.rcParams['axes.unicode_minus'] = False# -------------------- 使用自定义测试集 --------------------
idx = np.random.randint(len(testset)) # 随机选择测试集中的图片
image, label = testset[idx]
print(f"选择的图像类别: {classes[label]}")def tensor_to_np(tensor):img = tensor.cpu().numpy().transpose(1, 2, 0)# Update normalization to match ResNet's ImageNet statsmean = np.array([0.485, 0.456, 0.406])std = np.array([0.229, 0.224, 0.225])img = std * img + meanimg = np.clip(img, 0, 1)return imginput_tensor = image.unsqueeze(0).to(device)
# 原错误行:model.model.layer4[-1].conv2 → 改为 model.backbone.layer4[-1].conv2
grad_cam = GradCAM(model, model.backbone.layer4[-1].conv2) # 修正后:通过backbone访问ResNet层
heatmap, pred_class = grad_cam.generate_cam(input_tensor)plt.figure(figsize=(12, 4))
plt.subplot(1, 3, 1)
plt.imshow(tensor_to_np(image))
plt.title(f"原始图像: {classes[label]}")
plt.axis('off')plt.subplot(1, 3, 2)
plt.imshow(heatmap, cmap='jet')
plt.title(f"Grad-CAM热力图: {classes[pred_class]}")
plt.axis('off')plt.subplot(1, 3, 3)
img = tensor_to_np(image)
heatmap_resized = np.uint8(255 * heatmap)
heatmap_colored = plt.cm.jet(heatmap_resized)[:, :, :3]
superimposed_img = heatmap_colored * 0.4 + img * 0.6
plt.imshow(superimposed_img)
plt.title("叠加热力图")
plt.axis('off')plt.tight_layout()
plt.savefig('grad_cam_result.png')
plt.show()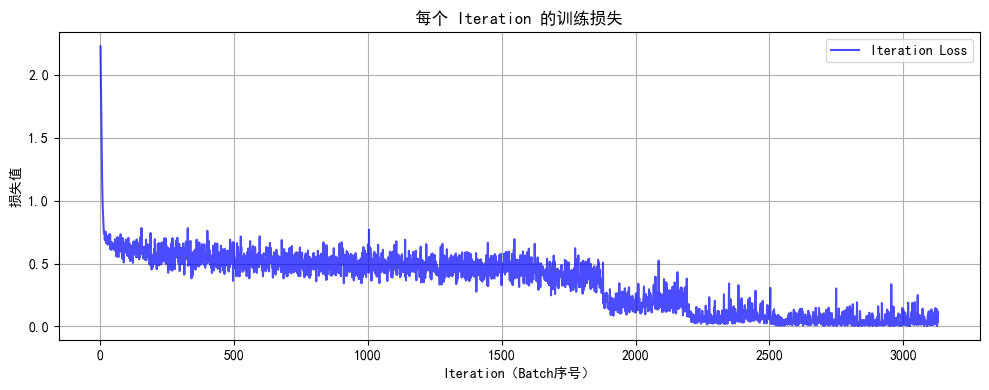 @浙大疏锦行