织梦论坛成都网站搜索排名优化公司
本文作者是360奇舞团开发工程师
引言
OpenAI发布了ChatGPT,就像是给平静许久的互联网湖面上扔了一颗重磅炸弹,刹那间所有人都在追捧学习它。究其原因,它其实是一款真正意义上的人工智能对话机器人。它使用了深度学习技术,通过大量的训练数据和自监督学习方法进行训练,以模拟人类的对话能力和生成自然语言回应。日常生产、学习中利用好ChatGPT这个工具,是绝对能够提升我们工作效率的,这一点对于我们程序员来说,感受应该尤为明显。我们最常用的开发工具VSCode,已经有许多的插件集成了ChatGPT功能,这篇文章将从零开始,介绍这些插件的实现原理与思路,希望对你有所帮助。
基本需求
实现一款可以跟ChatGPT对话的插件,可以通过一问一答的形式来进行对话,并且可以将我们选中的代码发送给ChatGPT,让其可以对代码进行优化。当然如果要访问ChatGPT,首先需要绑定我们在OpenAI后台申请的ApiKey.
VSCode 插件基本配置
首先简单介绍一下VSCode插件开发的基本流程
安装脚手架
npm install -g yo generator-code然后cd到你的工作目录,运行yo code,根据向导一步步选择即可,没啥好说的,运行完后就生成了一个干净的可以运行的插件工程了。
2. 工程目录介绍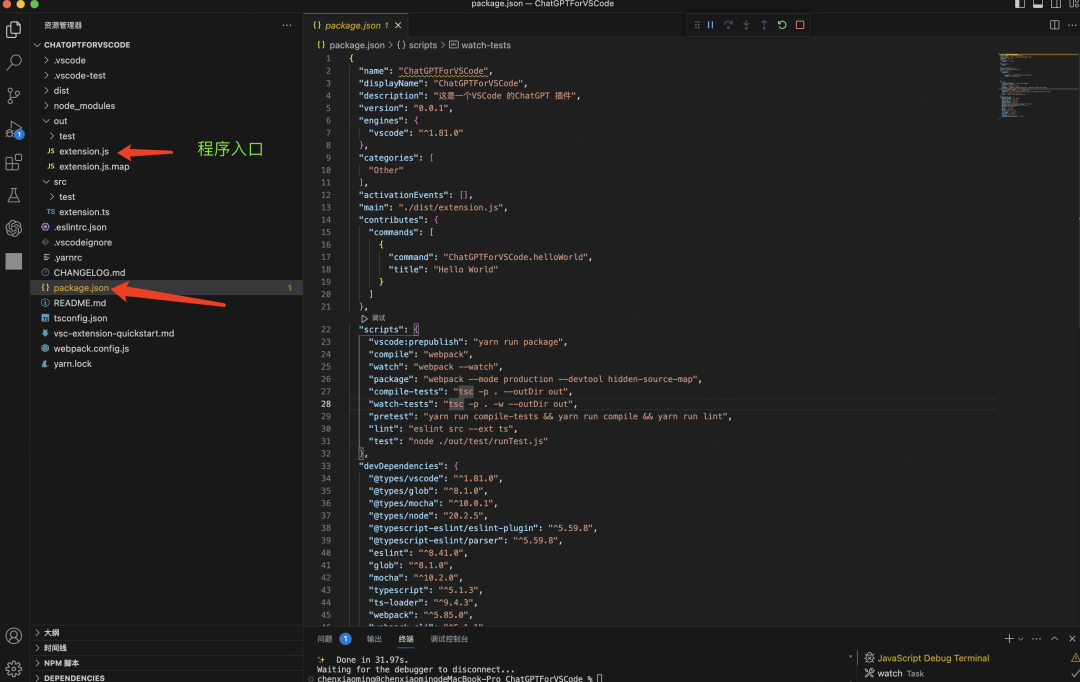
查看当前目录,工程的核心是package.json与extension.js.首先看下package.json的配置文件:
name:工程名称displayName: 应用市场名称description: 应用描述version: 当前插件版本engines: 表示插件最低支持的vscode版本categories: 插件应用市场分类main: 程序的主入口文件activationEvents:重要,扩展的激活事件数组,表示可以被哪些事件激活当前插件。比如:
"activationEvents": ["onView:chatgpt-for-vscode.view","onCommand:chatgpt-for-vscode.setAPIKey","onCommand:chatgpt-for-vscode.askGPT","onCommand:chatgpt-for-vscode.whyBroken","onCommand:chatgpt-for-vscode.optimizeCode","onCommand:chatgpt-for-vscode.explainCode","onCommand:chatgpt-for-vscode.refactor"],onView:表示 通过视图触发,chatgpt-for-vscode.view是视图Id。当触发这个视图时,唤起当前插件onCommand: 表示通过命令触发,后面是命令Id,这些都是我们自定义的命令。在VSCode中按下快捷键:Command + Shift + P 输入命令title后唤起插件,命令title在contributes,commands模块里面定义,后面介绍。
除了这两个还有:onLanguage、onUri、onDebug、workspaceContains、onFileSystem等,如果设置为*,只要一启动VSCode,插件就会被激活,当然为了用户体验,官方不推荐这么做。
contributes: 重要,配置插件的主要功能点。比如:
"contributes": {"commands": [{"command": "chatgpt-for-vscode.setAPIKey","title": "GPT:绑定APIKey"},{"command": "chatgpt-for-vscode.askGPT","title": "GPT:询问 GPT"},{"command": "chatgpt-for-vscode.whyBroken","title": "GPT:说明这段代码存在的问题"},{"command": "chatgpt-for-vscode.optimizeCode","title": "GPT:优化这段代码"},{"command": "chatgpt-for-vscode.explainCode","title": "GPT:解释这段代码"},{"command": "chatgpt-for-vscode.refactor","title": "GPT:重构这段代码"}],"menus": {"editor/context": [{"command": "chatgpt-for-vscode.askGPT","group": "navigation@1"},{"command": "chatgpt-for-vscode.whyBroken","group": "navigation@2"},{"command": "chatgpt-for-vscode.optimizeCode","group": "navigation@3"},{"command": "chatgpt-for-vscode.explainCode","group": "navigation@4"},{"command": "chatgpt-for-vscode.refactor","group": "navigation@5"},{"command": "chatgpt-for-vscode.setAPIKey","group": "navigation@6"}]},"viewsContainers": {"activitybar": [{"id": "chatgpt-for-vscode","title": "ChatGPT","icon": "images/ChatGPT.png"}]},"views": {"chatgpt-for-vscode": [{"type": "webview","id": "chatgpt-for-vscode.view","name": "ChatGPT"}]}},commands:
command: 命令Id,这个命令Id跟activationEvents中配置的命令Id相同。title:输入的命令的名称。Command + Shift + P输入这个命令title后找到对应的命令。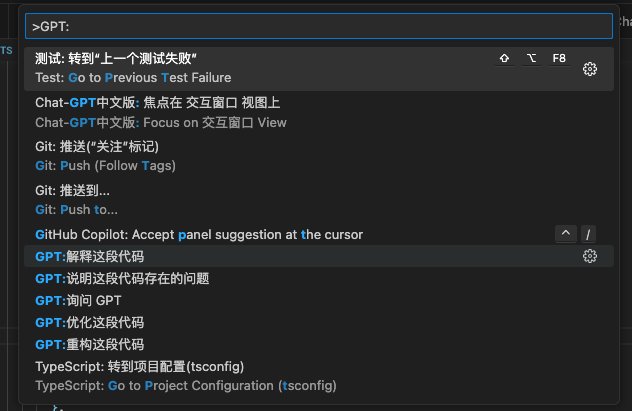
menus:
editor/context:配置编辑器右键展示内容。command是命令Id,group:右键后展示看板的命令位置。这里navigation表示展示在模块的顶部。@*表示排序。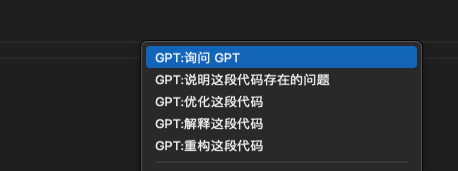
viewsContainers:activitybar:配置右侧工具栏视图入口,配置后展示,注意这里的id,要跟后面的views模块里面的视图key值保持一致,表示点击右侧icon后展示那个视图,icon是你本地的图片路径。
views: 配置视图,这里使用webview展示自定义视图
配置完成
package.json后右键命令展示,左侧状态栏Icon,顶部命令行选择输入命令,已经可以展示了。运行npm run test后会打开默认安装你插件的VSCode面板,接下来就是完善触发命令后的代码逻辑了,核心在extension.ts中实现。
extension.ts模块开发
extension.ts 是程序的入口文件,里面有两个核心方法:
export function activate(context: vscode.ExtensionContext) {}
export function deactivate() {}
看字面意思很好理解,分别表示插件被激活与释放调用的生命周期方法.
1. 绑定APIKey命令逻辑
要想使用OpenAI的api,首先需要将自己的ApiKey与插件进行关联。这里使用VSCode自有APIvscode.window.showInputBox来获取用户输入.
this.apiKey = await this.context.globalState.get('chatgpt-api-key');if (!this.apiKey) {const apiKeyInput = await vscode.window.showInputBox({prompt: "请输入你的API Key",ignoreFocusOut: true,});this.apiKey = apiKeyInput;this.context.globalState.update('chatgpt-api-key', this.apiKey);}使用上下文的
globalState来持久化保存ApiKey如果要让这个命令生效,需要在
activate中进行注册
context.subscriptions.push(vscode.commands.registerCommand('chatgpt-for-vscode.setAPIKey', resetToken))async function resetToken() {await vscode.window.showInputBox({prompt: "请输入OpenAI API Key",ignoreFocusOut: true,});
}
执行
command + shift + p输入命令titleGPT:绑定APIKey后,展示效果如下:
这样就完成了对用户ApiKey的绑定逻辑.

2. 命令触发逻辑
与绑定用户ApiKey类似,其他命令的执行也是同样的流程,这里以onCommand:chatgpt-for-vscode.askGPT命令来说明:
// 注册命令
vscode.commands.registerCommand('chatgpt-for-vscode.askGPT', askChatGPT)
// 命令实现
async function askChatGPT(userInput: string) {let editor = vscode.window.activeTextEditor;if (editor) {const selectedCode = editor.document.getText(vscode.window.activeTextEditor?.selection);if(selectedCode.length) {chatViewProvider.sendOpenAiApiRequest(userInput, selectedCode);vscode.window.showInformationMessage(selectedCode);}else {vscode.window.showInformationMessage(`请选中一段代码`);}}
}
注册命令后 使用
editor.document.getText(vscode.window.activeTextEditor?.selection)来获取选中的代码段落,并判空.利用
chatViewProvider.sendOpenAiApiRequest(userInput, selectedCode);利用这个方法用户输入的Prompt
与选中的代码端传递出去,这个方法的实现后面介绍,注册所有的命令后,activate方法是这样的
export function activate(context: vscode.ExtensionContext) {const chatViewProvider = new view_provider.default(context);context.subscriptions.push(vscode.commands.registerCommand('chatgpt-for-vscode.askGPT', askChatGPT), vscode.commands.registerCommand('chatgpt-for-vscode.whyBroken', askGPTWhyBroken), vscode.commands.registerCommand('chatgpt-for-vscode.explainCode', askGPTToExplain), vscode.commands.registerCommand('chatgpt-for-vscode.refactor', askGPTToRefactor), vscode.commands.registerCommand('chatgpt-for-vscode.optimizeCode', askGPTToOptimize), vscode.commands.registerCommand('chatgpt-for-vscode.setAPIKey', resetToken), vscode.window.registerWebviewViewProvider("chatgpt-for-vscode.view", chatViewProvider, {webviewOptions: { retainContextWhenHidden: true }}));async function askGPTWhyBroken() { await askChatGPT('说明下面的代码会出现什么问题?'); }async function askGPTToExplain() { await askChatGPT('请帮我解释一下下面的代码?'); }async function askGPTToRefactor() { await askChatGPT('帮我重构下面的代码'); }async function askGPTToOptimize() { await askChatGPT('帮我优化下面的代码'); }async function resetToken() {await chatViewProvider.ensureApiKey();}async function askChatGPT(userInput: string) {let editor = vscode.window.activeTextEditor;if (editor) {const selectedCode = editor.document.getText(vscode.window.activeTextEditor?.selection);if(selectedCode.length) {chatViewProvider.sendOpenAiApiRequest(userInput, selectedCode);vscode.window.showInformationMessage(selectedCode);}else {vscode.window.showInformationMessage(`请选中一段代码`);}}}
}
3.webView与chatViewProvider
上面的代码除了注册命令的APIregisterCommand,还有一个注册自定义webview视图的API,registerWebviewViewProvider,作用是展示我们自定义的webview,它有三个参数:
chatgpt-for-vscode.view是视图Id,跟package.json中views模块对应的Id相同,表示为那个视图Id注册provider.chatViewProvider视图提供者.第三个参数:
webview的属性配置,retainContextWhenHidden: true表示:webview被隐藏时保持状态,避免被重置.
接下来重点来看chatViewProvider:
作为自定义视图的provider首先需要继承vscode.WebviewViewProvider这个接口
export interface WebviewViewProvider {/*** Revolves a webview view.** `resolveWebviewView` is called when a view first becomes visible. This may happen when the view is* first loaded or when the user hides and then shows a view again.** @param webviewView Webview view to restore. The provider should take ownership of this view. The* provider must set the webview's `.html` and hook up all webview events it is interested in.* @param context Additional metadata about the view being resolved.* @param token Cancellation token indicating that the view being provided is no longer needed.** @return Optional thenable indicating that the view has been fully resolved.*/resolveWebviewView(webviewView: WebviewView, context: WebviewViewResolveContext, token: CancellationToken): Thenable<void> | void;}这个接口只有一个方法,resolveWebviewView在视图首次可见时被调用。这可能发生在视图第一次加载时,或者当用户隐藏然后再次显示视图时。在这个方面里面设置webview的html与视图属性。
export default class ChatGptViewProvider implements vscode.WebviewViewProvider {private webView?: vscode.WebviewView;private apiKey?: string;private message?: any;constructor(private context: vscode.ExtensionContext) { }public resolveWebviewView(webviewView: vscode.WebviewView,_context: vscode.WebviewViewResolveContext,_token: vscode.CancellationToken,) {this.webView = webviewView;// webview属性设置webviewView.webview.options = {enableScripts: true,localResourceRoots: [this.context.extensionUri]};// 返回Html代码webviewView.webview.html = this.getHtml(webviewView.webview);// 接收webviewView.webview.onDidReceiveMessage(data => {if (data.type === 'askChatGPT') {this.sendOpenAiApiRequest(data.value);}});if (this.message !== null) {this.sendMessageToWebView(this.message);this.message = null;}}
}
4. 通信机制
自定义的webview和普通网页非常类似,都不能直接调用任何VSCodeAPI,但是,它唯一特别之处就在于多了一个名叫acquireVsCodeApi的方法,执行这个方法会返回一个超级阉割版的vscode对象.利用这个对象,可以实现webview与插件也就是provider的通信。
provider给webview发送消息:
this.webView?.webview.postMessage(message);webview端接收消息:
window.addEventListener('message', event => {const message = event.data;console.log('Webview接收到的消息:', message);
}webview主动发送消息给provider:
const vscode = acquireVsCodeApi();
vscode.postMessage({text: '你好,我是Webview啊!'});provider接收消息:
this.webView?.webview.onDidReceiveMessage(data => {if (data.type === 'askChatGPT') {this.sendOpenAiApiRequest(data.value);}
});了解完双方的通信机制后,基本逻辑是:当点击webview上的发送按钮后,将用户输入发送给ChatGPT,ChatGPT处理完成后将返回信息发送给webview,webview将回答信息展示出来,完成一次对话逻辑。
// 按钮绑定点击事件
document.getElementById("ask-button")?.addEventListener("click", submitHandler);
let submitHandler = function (e) {e.preventDefault();e.stopPropagation();const input = document.getElementById("question-input");if (input.value?.length > 0) {// 发送消息给 插件,使其完成ChatGPT请求vscode.postMessage({type: "askChatGPT",value: input.value,});input.value = "";}
};
5. 调用OPenAI接口
要想完成一次对话,需要调用OPenAI的API.具体的API你可以在官网找到: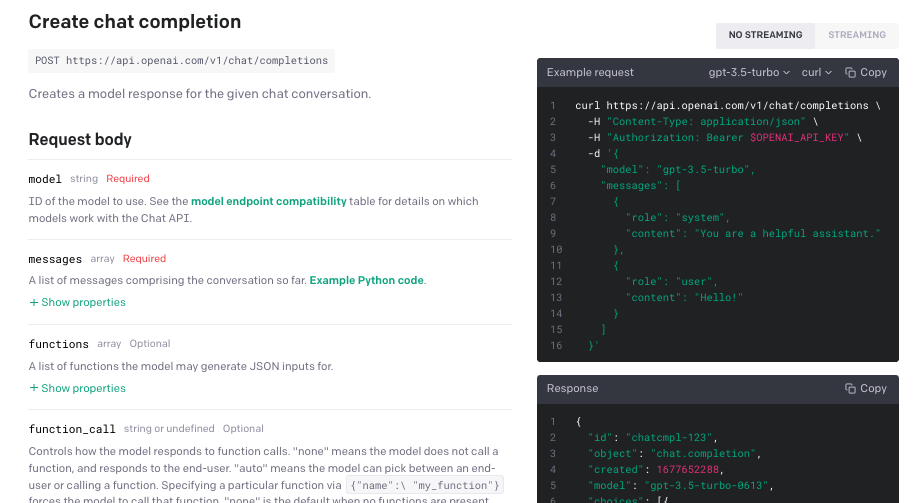
参数
model是你要对话的ChatGPT模型代码,不同模型针对同一个问题的答案会有所区别。具体模块区别可以参考下面图片: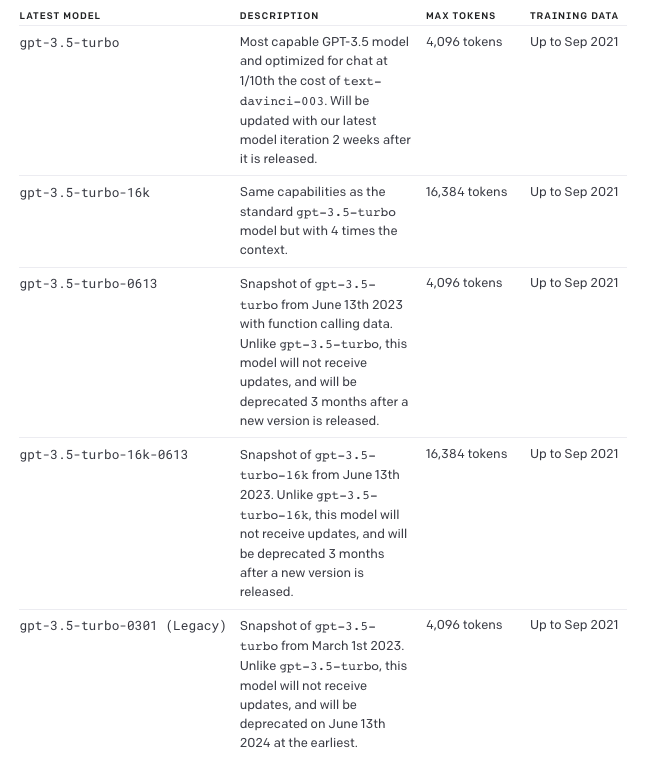
更多模型可以点击这里去查看参数
messages: 你的问题信息参数
temperature: 它是一个用于控制生成文本的创造性的参数,其值介于0到2之间。值为1意味着模型将使用其默认采样策略,而值低于1.0将导致更保守和可预测的响应,值大于1.0将导致更有创造性和多样化的响应。参数
max_tokens: 生成对话的最大token数量。这里的token可以理解为模型的构建块。了解完成上面的参数,可以利用fetch发起请求了:
let completion =  await fetch('https://api.openai.com/v1/chat/completions', {method: 'POST',body: JSON.stringify({model: "text-davinci-003",messages: [{ role: "user", content: question }],temperature: 0.7}),headers: {// eslint-disable-next-line @typescript-eslint/naming-convention"Content-Type": 'application/json',Authorization: 'Bearer ' + this.apiKey,},
}) as any;根据返回的数据结构,解析响应数据,并将结果发送给webview进行展示,完成开发。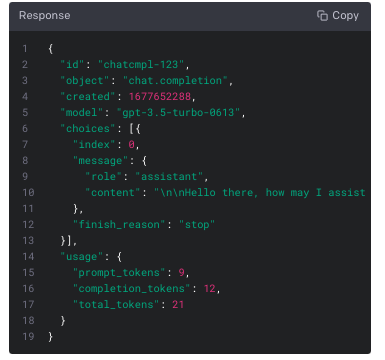
发布插件
扩展安装
通过以上步骤基本完成了插件的开发,接下来有两种方式发布我们的插件,如果你的插件只是在内网使用,可以通过命令:vsce package, 将插件打包为vsix插件包,通过VSCode的扩展,从VSIX安装.
当然首先要安装vsce这个工具
npm i vsce -g
上传到应用
VSCode插件市场插件上传到
VSCode应用市场,需要有应用市场的publisher账号,具体的账号创建流程这里不再涉及,创建账号后,登录当前账号,执行vsce publish,发布成功后大概需要过几分钟才能在应用市场搜到.发布账号有几个注意事项:README.md文件默认会显示在插件主页;README.md中的资源必须全部是HTTPS的,如果是HTTP会发布失败;CHANGELOG.md会显示在变更选项卡;如果代码是放在
git仓库并且设置了repository字段,发布前必须先提交git,否则会提示Git working directory not clean发布后需要等待几分钟应用市场才会更新;
当然你可以在插件市场里面搜索
chatgpt-for-vscode来试用这个插件;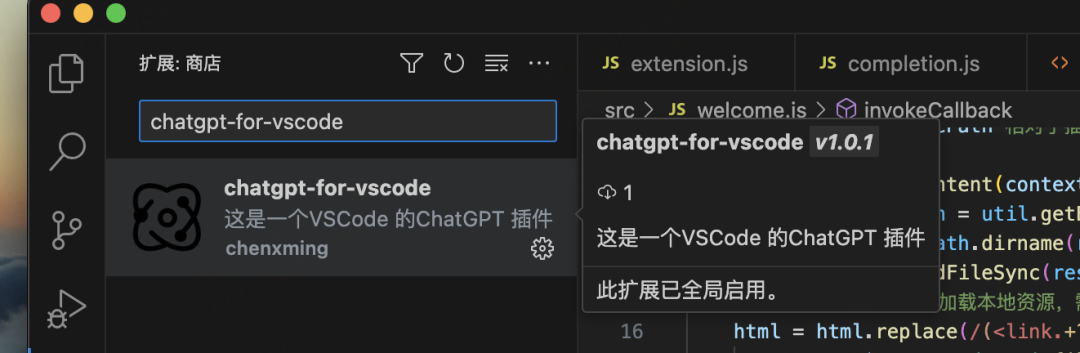
总结
以上就是一个ChatGPT插件的基本创建流程,核心是对VSCode API以及ChatGPT API的了解与使用。当然你所需要的功能都可以在对应的官方文档中找到。
参考文献:
https://code.visualstudio.com/api/extension-guides/overview
https://platform.openai.com/docs/api-reference/chat/create
http://blog.haoji.me/vscode-plugin-publish.html
- END -
关于奇舞团
奇舞团是 360 集团最大的大前端团队,代表集团参与 W3C 和 ECMA 会员(TC39)工作。奇舞团非常重视人才培养,有工程师、讲师、翻译官、业务接口人、团队 Leader 等多种发展方向供员工选择,并辅以提供相应的技术力、专业力、通用力、领导力等培训课程。奇舞团以开放和求贤的心态欢迎各种优秀人才关注和加入奇舞团。