无锡市做企业网站的seo外链代发
ECharts中SVG图标定与响应式适配实践笔记
一、导入SVG图并标定:位置不同步问题
问题现象:
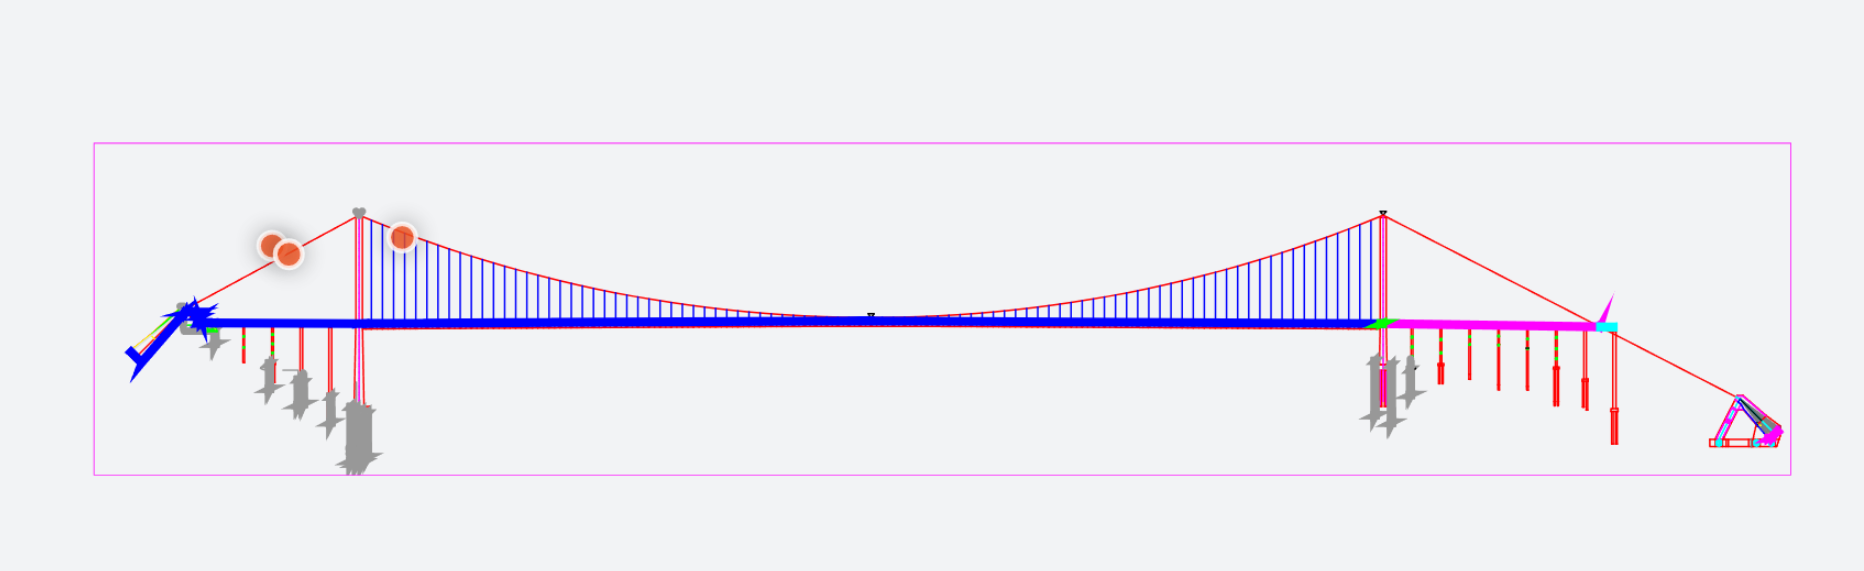
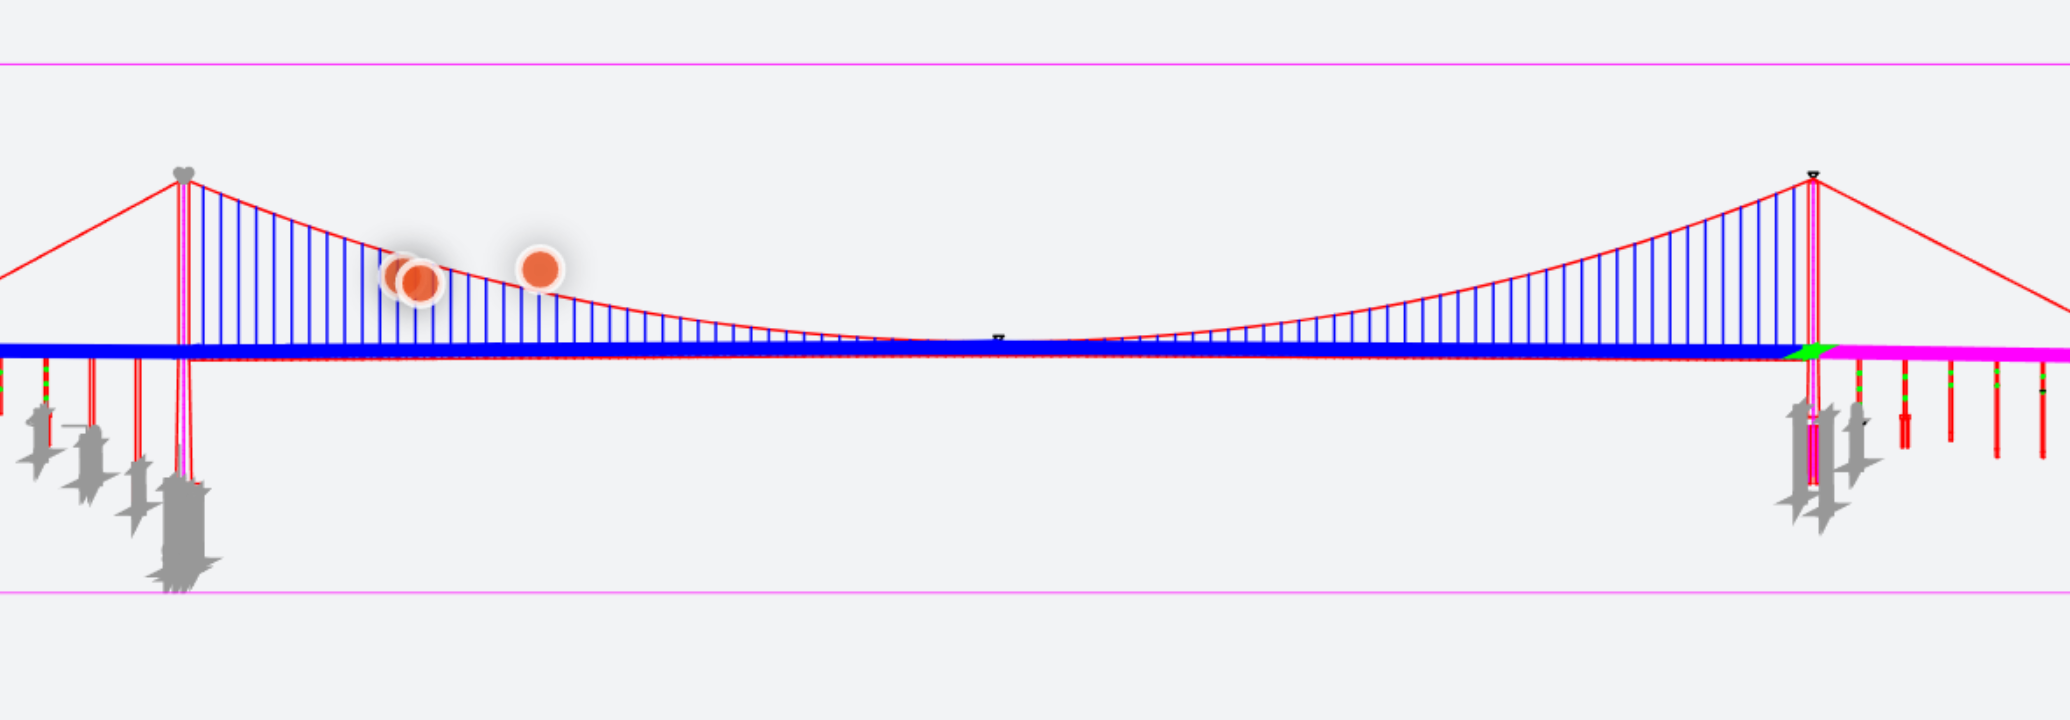
当缩放浏览器窗口时,SVG图上的标定点位会发生位置偏移,与实际坐标不匹配。
原因分析:
ECharts在窗口缩放时会自动重新计算坐标系,但SVG图的尺寸未同步更新,导致标记点与SVG的相对位置错位。
初始实现代码:
<template><div className="bridge-marker-container"><div ref="chartContainer" className="chart-container"/></div>
</template>
// 此处省略完整代码(见原博客)
核心问题:
- SVG作为背景图未绑定窗口缩放事件
- ECharts坐标系与SVG的viewBox坐标系未做动态映射
二、尝试注册地图失败:SVG格式限制
ECharts对地图SVG的特殊要求(需满足以下条件才能注册为地图):
- 路径元素必须有唯一id:每个地理区域的
<path>需设置id,用于数据映射(如id="guangdong"对应广东省)。 - 单一路径元素:地理区域需用独立的
<path>表示,禁止使用组合图形(如<g>包裹多个路径)。 - 禁止复杂效果:SVG中不能包含滤镜(filter)、渐变(gradient)等样式,仅支持基础矢量路径。
- 命名空间规范:需包含正确的XML命名空间声明(如
<svg xmlns="http://www.w3.org/2000/svg">)。
三、禁用窗口监听的失败尝试
尝试方案:
注释掉窗口监听代码以阻止ECharts自动缩放:
// window.addEventListener('resize', resizeChart); // 注释此行
失败现象:
- 首次缩放窗口时,标记点位置暂时稳定(因ECharts未重新计算)。
- 但当数据重新加载或图表更新时,ECharts会重新计算布局,导致标记点位置突然偏移。
结论:
单纯禁用监听无法解决根本问题,需同时控制SVG与坐标系的同步缩放。
四、手动实现SVG响应式缩放:成功方案
核心思路:
通过监听窗口变化,手动计算缩放比例并同步调整SVG尺寸,确保标记点与SVG的相对位置不变。
实现步骤:
- 记录初始容器尺寸:在图表初始化时保存容器的宽高,作为缩放基准。
- 计算实时缩放比例:窗口变化时,对比当前与初始尺寸,获取宽高缩放系数。
- 动态调整SVG尺寸:根据缩放比例更新SVG的宽高,保持与坐标系同步。
完整代码实现:
<template><div className="bridge-marker-container"><div ref="chartContainer" className="chart-container"/></div>
</template><script setup>
import {ref, onMounted, onUnmounted, watch} from 'vue';
import * as echarts from 'echarts';// 组件属性(新增viewBox配置以匹配SVG坐标系)
const props = defineProps({svgUrl: { type: String, default: 'src/pages/bridge/bridge.svg' },markers: { type: Array, default: () => [[210, 200], [240, 260], [185, 265]] },markerSize: { type: Number, default: 6 },markerColor: { type: String, default: '#FF5722' },viewBox: { type: Array, default: () => [0, 0, 842, 595] }
});// 实例引用与初始尺寸记录
const chartContainer = ref(null);
let chartInstance = null;
let initialWidth = 0;
let initialHeight = 0;// 初始化图表(新增初始尺寸记录)
const initChart = async () => {if (!chartContainer.value) return;if (chartInstance) chartInstance.dispose();chartInstance = echarts.init(chartContainer.value);initialWidth = chartContainer.value.offsetWidth;initialHeight = chartContainer.value.offsetHeight;try {const svgContent = await loadSvgContent(props.svgUrl);chartInstance.setOption({// 显示网格与坐标轴(便于观察缩放效果)xAxis: {show: true, min: props.viewBox[0], max: props.viewBox[0] + props.viewBox[2],splitLine: { show: true, lineStyle: { color: 'rgba(200,200,200,0.5)', type: 'dashed' } }},yAxis: {show: true, min: props.viewBox[1], max: props.viewBox[1] + props.viewBox[3],inverse: true, splitLine: { show: true, lineStyle: { color: 'rgba(200,200,200,0.5)', type: 'dashed' } }},// SVG作为背景图(关键配置)graphic: [{type: 'image',style: { image: svgContent, width: props.viewBox[2], height: props.viewBox[3] },left: 'center', top: 'center', z: -10}],// 标记点系列(保持原始坐标映射)series: [{type: 'scatter', data: props.markers, symbolSize: props.markerSize,itemStyle: { color: props.markerColor, borderWidth: 2, borderColor: '#fff' }}],grid: { left: 0, right: 0, top: 0, bottom: 0 }});window.addEventListener('resize', resizeChart);} catch (error) {console.error('SVG加载失败:', error);chartInstance.setOption({ title: { text: 'SVG加载失败', color: '#ff4d4f' } });}
};// 关键:手动处理窗口缩放
const resizeChart = () => {if (chartInstance) chartInstance.resize();const currentWidth = chartContainer.value.offsetWidth;const currentHeight = chartContainer.value.offsetHeight;const widthScale = currentWidth / initialWidth;const heightScale = currentHeight / initialHeight;// 获取并更新SVG尺寸const option = chartInstance.getOption();const svgElement = option.graphic[0].elements[0];svgElement.style.width = props.viewBox[2] * widthScale;svgElement.style.height = props.viewBox[3] * heightScale;chartInstance.setOption({ graphic: { elements: [svgElement] } });
};// 其余代码(加载SVG、监听props、生命周期钩子)与原博客一致
</script>
效果验证:
- 窗口缩放时,SVG图与标记点保持同步缩放,坐标位置始终准确。
- 网格线与坐标系同步更新,验证了SVG与ECharts坐标系的动态映射有效性。
五、扩展思考:SVG与ECharts的坐标映射原理
- viewBox属性:SVG的
viewBox="x y width height"定义了原始坐标系,需与ECharts的xAxis/yAxis的min/max配置一致。 - 缩放比例计算:通过
offsetWidth获取容器实时尺寸,避免使用window.innerWidth导致的浏览器边框误差。 - 性能优化:可添加
debounce防抖处理,避免高频缩放时的重绘开销。
此方案适用于需要在ECharts中实现自定义SVG标绘的场景,如工业设备图纸标注、建筑平面图标记等。