广州学习做网站建设的学校网络营销策划ppt范例
关于Flutter Sliver组件内容可以参考下面这位博主博客,写的已经非常好了,这里就不再赘述。
38、Flutter之 可滚动组件简介_flutter 可滑动_风雨「83」的博客-CSDN博客
通过阅读上面的博客,我们已经知道了Scrollable和Viewport基础概念,接下来跟随作者一起,结合Flutter源码分析下ViewPort是如何滚动。
先看一个简单的demo
MaterialApp(home: Scaffold(body: Center(child: Container(height: 300,child: Scrollable(viewportBuilder: (BuildContext context, ViewportOffset position) {return Viewport(offset: position,slivers: [SliverToBoxAdapter(child: Container(width: 100,height: 100,color: Colors.lightBlue,),),SliverToBoxAdapter(child: Container(width: 100,height: 100,color: Colors.pink,),),SliverToBoxAdapter(child: Container(width: 100,height: 100,color: Colors.green,),),SliverToBoxAdapter(child: Container(width: 100,height: 100,color: Colors.black,),),SliverToBoxAdapter(child: Container(width: 100,height: 100,color: Colors.red,),)],);},))),),)就是一个简单的滚动列表,可以上下滚动。
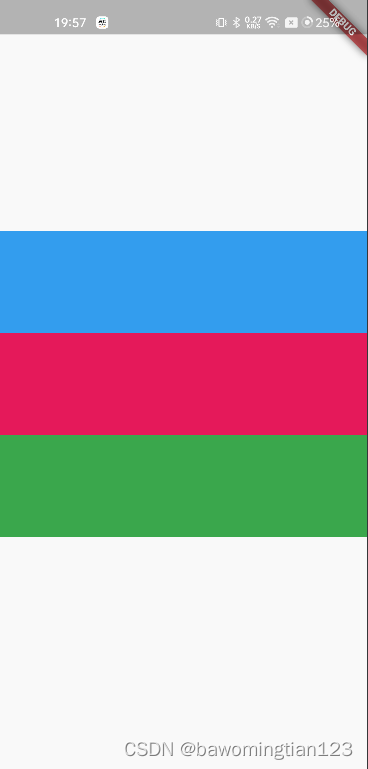
上面是一个简单的滚动列表,当手指触摸屏幕时,内容随之发上移动(滚动)。
下面我们从Flutter刷新机制来梳理下列表里面的组件是在什么时机,由谁触发重新布局的(组件的位移就是重新布局的体现)。
class Viewport extends MultiChildRenderObjectWidget {......@overrideRenderViewport createRenderObject(BuildContext context) {return RenderViewport(axisDirection: axisDirection,crossAxisDirection: crossAxisDirection ?? Viewport.getDefaultCrossAxisDirection(context, axisDirection),anchor: anchor,offset: offset,cacheExtent: cacheExtent,cacheExtentStyle: cacheExtentStyle,clipBehavior: clipBehavior,);}@overridevoid updateRenderObject(BuildContext context, RenderViewport renderObject) {renderObject..axisDirection = axisDirection..crossAxisDirection = crossAxisDirection ?? Viewport.getDefaultCrossAxisDirection(context, axisDirection)..anchor = anchor..offset = offset..cacheExtent = cacheExtent..cacheExtentStyle = cacheExtentStyle..clipBehavior = clipBehavior;}Viewport 继承MultiChildRenderObjectWidget,与之对应的RenderObject是RenderViewport,相关布局逻辑肯定是在RenderViewport 内部实现。
class RenderViewport extends RenderViewportBase<SliverPhysicalContainerParentData> {RenderViewport({super.axisDirection,required super.crossAxisDirection,required super.offset,double anchor = 0.0,List<RenderSliver>? children,RenderSliver? center,super.cacheExtent,super.cacheExtentStyle,super.clipBehavior,})这里我们重点关注offset这个参数(其他参数不是本篇内容考虑的范围),这个参数在刚刚Viewport 里面赋值,这个参数是重点,后面会用到。
我们知道RenderViewport管理一个List<RenderSliver> 列表,列表内容滚动就是该父组件对子组件列表重新布局的结果,我们直接找到其performLayou方法
@overridevoid performLayout() {......int count = 0;do {assert(offset.pixels != null);correction = _attemptLayout(mainAxisExtent, crossAxisExtent, offset.pixels + centerOffsetAdjustment);if (correction != 0.0) {offset.correctBy(correction);} else {if (offset.applyContentDimensions(math.min(0.0, _minScrollExtent + mainAxisExtent * anchor),math.max(0.0, _maxScrollExtent - mainAxisExtent * (1.0 - anchor)),)) {break;}}count += 1;} while (count < _maxLayoutCycles);......}());}performLayout方法中
correction = _attemptLayout(mainAxisExtent, crossAxisExtent, offset.pixels + centerOffsetAdjustment);是我们关注的重点。
double _attemptLayout(double mainAxisExtent, double crossAxisExtent, double correctedOffset) {......// positive scroll offsetsreturn layoutChildSequence(child: center,scrollOffset: math.max(0.0, -centerOffset),overlap: leadingNegativeChild == null ? math.min(0.0, -centerOffset) : 0.0,layoutOffset: centerOffset >= mainAxisExtent ? centerOffset: reverseDirectionRemainingPaintExtent,remainingPaintExtent: forwardDirectionRemainingPaintExtent,mainAxisExtent: mainAxisExtent,crossAxisExtent: crossAxisExtent,growthDirection: GrowthDirection.forward,advance: childAfter,remainingCacheExtent: forwardDirectionRemainingCacheExtent,cacheOrigin: clampDouble(centerOffset, -_calculatedCacheExtent!, 0.0),);}我们找到了layoutChildSequence方法,从方法名就能知道,这个方法功能就是对子组件列表按照顺序重新布局的。
@protecteddouble layoutChildSequence({required RenderSliver? child,required double scrollOffset,required double overlap,required double layoutOffset,required double remainingPaintExtent,required double mainAxisExtent,required double crossAxisExtent,required GrowthDirection growthDirection,required RenderSliver? Function(RenderSliver child) advance,required double remainingCacheExtent,required double cacheOrigin,}) {......while (child != null) {......child.layout(SliverConstraints(axisDirection: axisDirection,growthDirection: growthDirection,userScrollDirection: adjustedUserScrollDirection,scrollOffset: sliverScrollOffset,precedingScrollExtent: precedingScrollExtent,overlap: maxPaintOffset - layoutOffset,remainingPaintExtent: math.max(0.0, remainingPaintExtent - layoutOffset + initialLayoutOffset),crossAxisExtent: crossAxisExtent,crossAxisDirection: crossAxisDirection,viewportMainAxisExtent: mainAxisExtent,remainingCacheExtent: math.max(0.0, remainingCacheExtent + cacheExtentCorrection),cacheOrigin: correctedCacheOrigin,), parentUsesSize: true);......// move on to the next childchild = advance(child);}// we made it without a correction, whee!return 0.0;}这个方法就是在不停循环获取下一个child,直到最后一个需要布局的child组件。
大体流程就是这样的,细心的你一定发现,上面没有说明组件是如何根据手指滑动滚动的,也就是如何触发RenderViewport 执行performLayout方法。
不要急,下面就来说明这一点。
还记得上面提到的offset这个参数吗?重头戏就是它。
set offset(ViewportOffset value) {assert(value != null);if (value == _offset) {return;}if (attached) {_offset.removeListener(markNeedsLayout);}_offset = value;if (attached) {_offset.addListener(markNeedsLayout);}// We need to go through layout even if the new offset has the same pixels// value as the old offset so that we will apply our viewport and content// dimensions.markNeedsLayout();}当上面我们给RenderViewport 配置offset参数是,offset是一个ChangeNotifer ,可以添加变化监听
abstract class ViewportOffset extends ChangeNotifier {/// Default constructor.////// Allows subclasses to construct this object directly.ViewportOffset();
......
}
当offset 只有的变量更新后,通知监听它的回调函数markNeedsLayout,这里就回到了Flutter组件渲染大流程里面了。
这个流程下来是不是非常巧妙,希望大家阅读完后,也能写出如此巧妙的架构。